Category: Things to Do

Vancouver attractions, activities, and experiences — the full cocoon of Things to Do guides for visitors.

  • Vancouver on Foot: Walking Routes & Safety (2026)

    Vancouver on Foot: Walking Routes & Safety (2026)

    Hero Walking
    Photo by Luke Miller via Pexels. Walking tours Vancouver — one of North America’s most walkable cities.

    Walking tours Vancouver are the best way to experience the city’s most photogenic neighborhoods at the right pace. Vancouver consistently ranks in the top 10 most walkable cities in North America, with downtown core neighborhoods (Gastown, Yaletown, Chinatown, West End) all under 30 minutes’ walk apart. Free guided walking tours run daily; self-guided tours via apps like VanWalks and GPSmyCity make exploring on your own easy.

    This guide covers the best walking tour options — guided and self-guided — for Vancouver’s main neighborhoods, key safety considerations, recommended apps, and detailed walking routes you can do without a guide. By the end you’ll know exactly which routes to take and the local context that makes each stop meaningful.

    Walk Overview
    Photo by Erik Mclean via Pexels. Walking tours quick facts — Walk Score 96/100; free guided tours daily.

    Walking Tours Vancouver: Quick Facts

    • Walk Score: Vancouver downtown rates 96/100 (Walker’s Paradise)
    • Free guided tours: Daily across multiple neighborhoods (tip-based)
    • Tour duration: 90 minutes to 3 hours typical
    • Self-guided apps: VanWalks, GPSmyCity, AudioMe — all available iOS/Android
    • Best routes for visitors: Gastown, Chinatown, Yaletown, Stanley Park, Granville Island
    • Year-round friendly: Even rainy weather works with proper gear
    Walk Walkability
    Photo by Line Knipst via Pexels. Why Vancouver is so walkable — compact downtown, great pedestrian infrastructure.

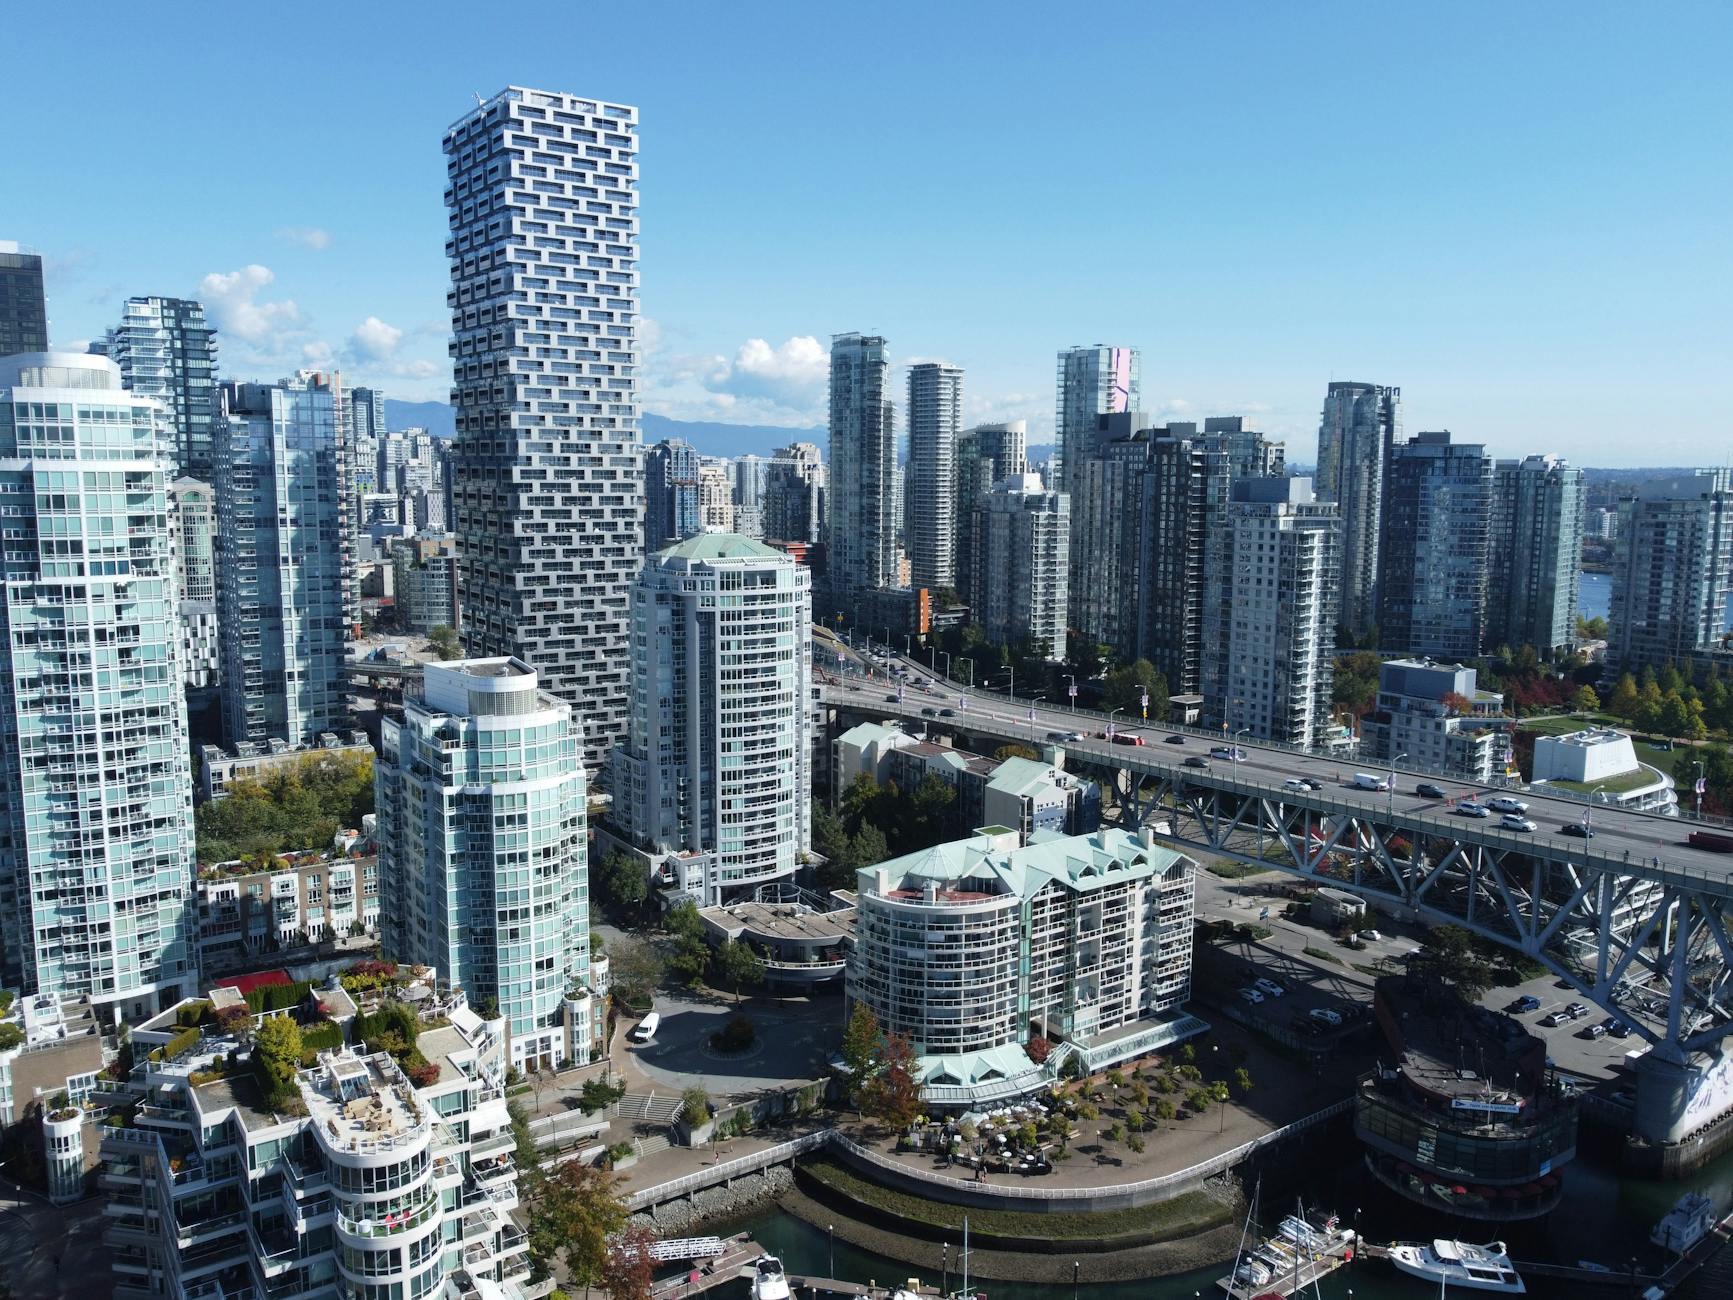
    Why Vancouver Is So Walkable

    Vancouver’s downtown layout makes walking the most efficient way to explore.

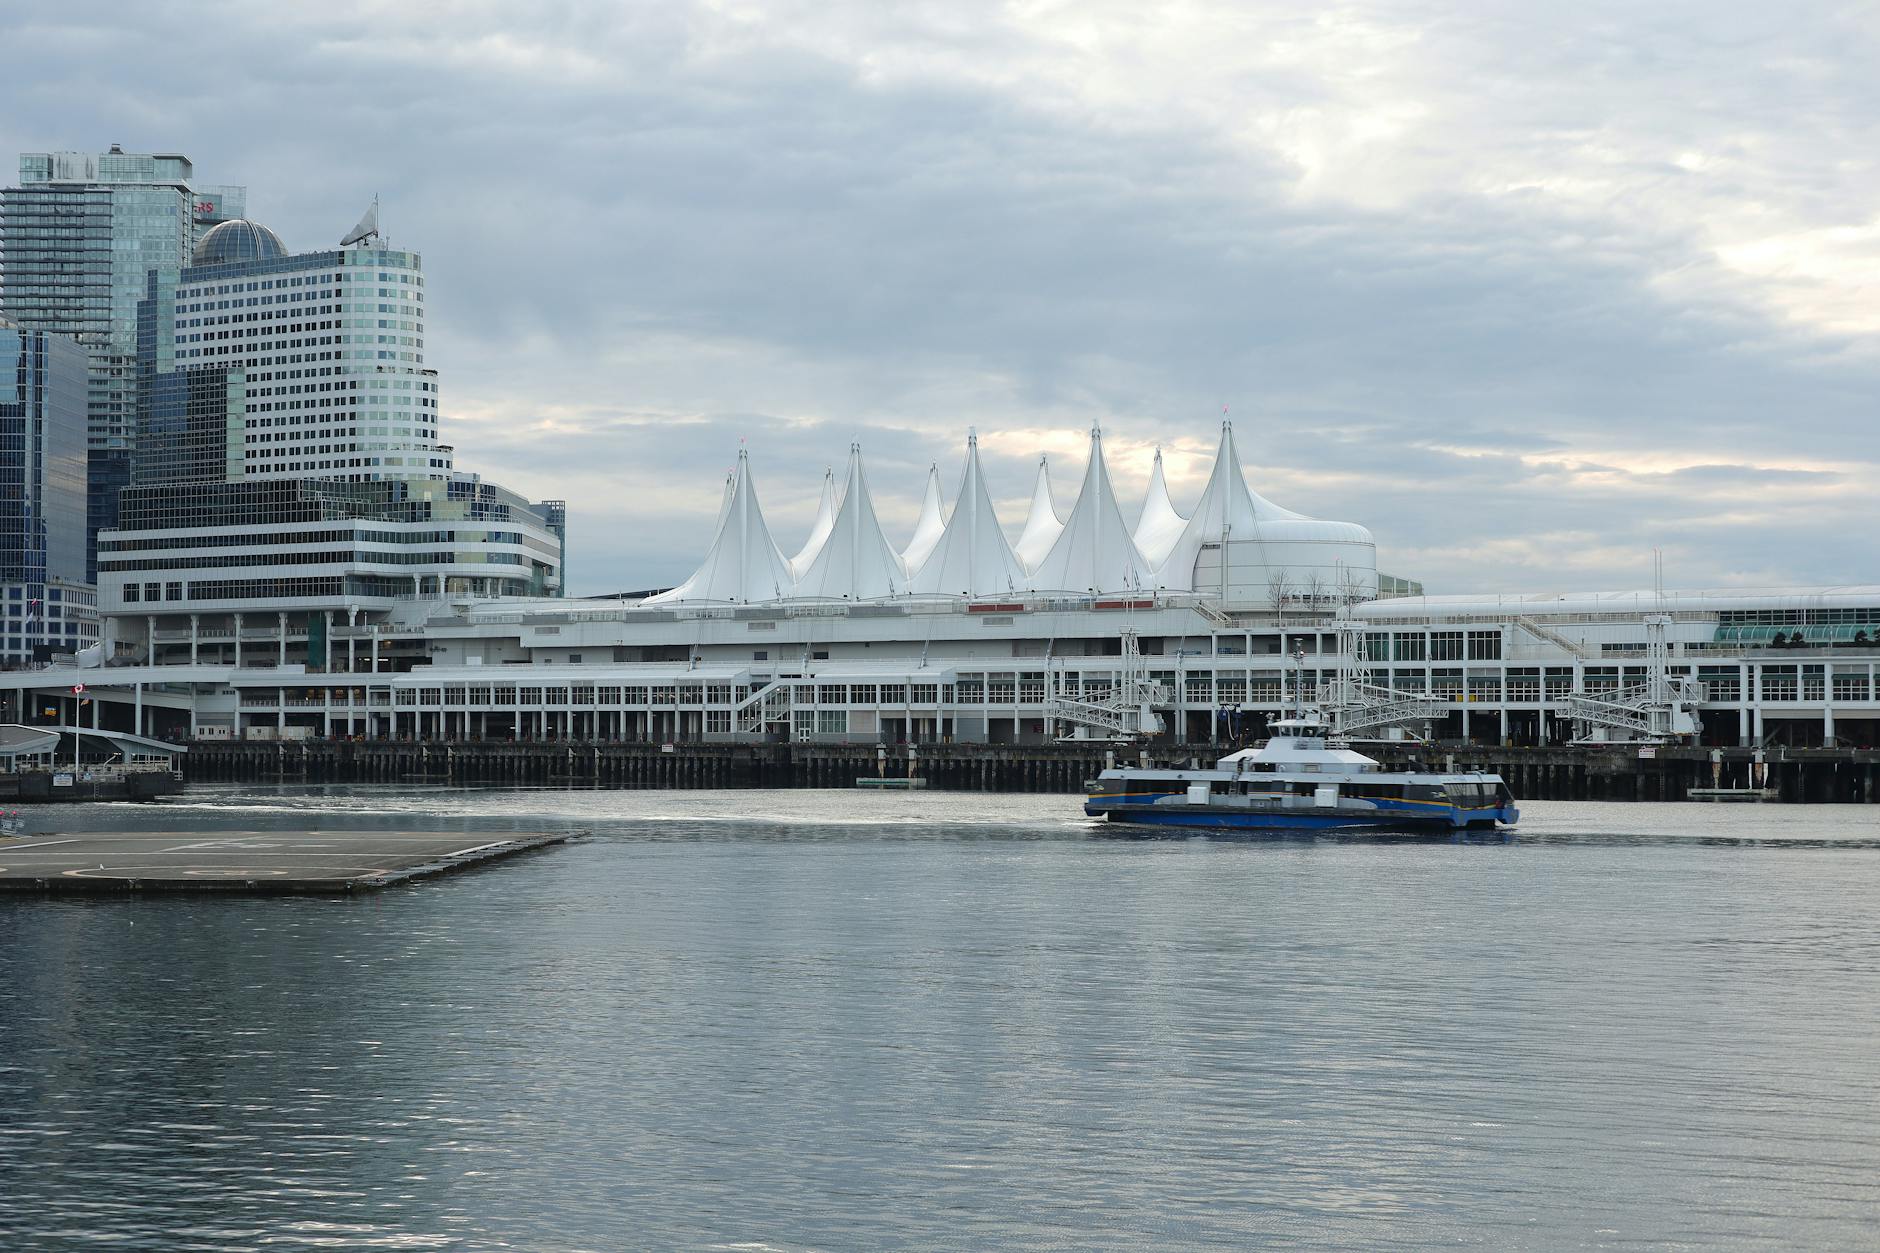
    Compact downtown core: The downtown peninsula is only 3 km across. Gastown to Yaletown: 15 minutes. Yaletown to Coal Harbour: 15 minutes. Coal Harbour to Stanley Park entrance: 10 minutes.

    Pedestrian infrastructure: Wide sidewalks, frequent crossings with countdown timers, separated bike lanes that don’t conflict with walkers, abundant covered awnings for rain.

    Public art and points of interest: Downtown has 100+ public art pieces along walking routes — including Olympic Cauldron, Spirit of Haida Gwaii (YVR Airport), various neighborhood murals.

    Coffee culture: Cafés every 2-3 blocks make natural rest stops. Vancouver’s specialty coffee scene is one of North America’s strongest.

    Year-round comfort: Mild temperatures (no extreme heat or cold), low humidity, and the city’s commitment to maintaining sidewalks even in rain make walking practical 12 months a year.

    Walk Free Guided
    Photo by Tahir Xəlfə via Pexels. Free guided walking tours — tip-based tours of Gastown, Granville, downtown.

    Free Guided Walking Tours

    Several tour companies offer “free” tours where you tip the guide what you think is fair (typical: C$15-20 per person).

    Forbidden Vancouver Walking Tours: Specializes in Gastown’s seedy past, Vancouver’s craft brewery history, and the city’s lost neighborhoods. Multiple themed tours daily. forbidvancouver.com.

    Tour Guys Vancouver: Free tours of Gastown, Granville Island, downtown. No reservation typically needed. tourguys.ca.

    Vancouver Free Walking Tour: Multiple themed tours including downtown, Gastown, and Stanley Park. vancouverwalkingtours.com.

    How to find them: Most start at central downtown locations (Vancouver Convention Centre, Steam Clock, Robson Square). Sign up online or just show up.

    Tour expectations: 2-3 hours typically. Cover roughly 2-3 km of walking. Engaging guides who know the city’s history and stories. Tips expected at end.

    Walk Paid Guided
    Photo by Lorna Pauli via Pexels. Paid guided tours — A Wok Around Chinatown, Vancouver Foodie Tours, Talaysay.

    Paid Guided Walking Tours

    For more specialized themes or smaller groups, paid tours offer extra value.

    A Wok Around Chinatown: 3-hour culinary walking tour with food tastings at 4-6 stops. C$95-110 per person. awokaroundchinatown.com.

    Vancouver Foodie Tours: Multiple themed food tours — Granville Island Public Market, Gastown craft beer, downtown gourmet. C$60-100 per person. vancouverfoodietour.com.

    Granville Island Cooking Tour: Combination market tour + cooking class. Roughly 4 hours, C$140-180.

    Capilano Suspension Bridge Park Guided Tours: Included with park admission, 60-minute guided walks every hour.

    Stanley Park Guided Walks: Talaysay Tours offers Indigenous-led walking tours of Stanley Park focusing on Squamish, Tsleil-Waututh, and Musqueam history. 2 hours, C$60-80.

    Photography Walking Tours: Vancouver Photo Walks runs themed photo tours of various neighborhoods with instruction on composition and editing. C$80-150.

    Walk Apps
    Photo by Theo Decker via Pexels. Self-guided tour apps — VanWalks, GPSmyCity, AudioMe.

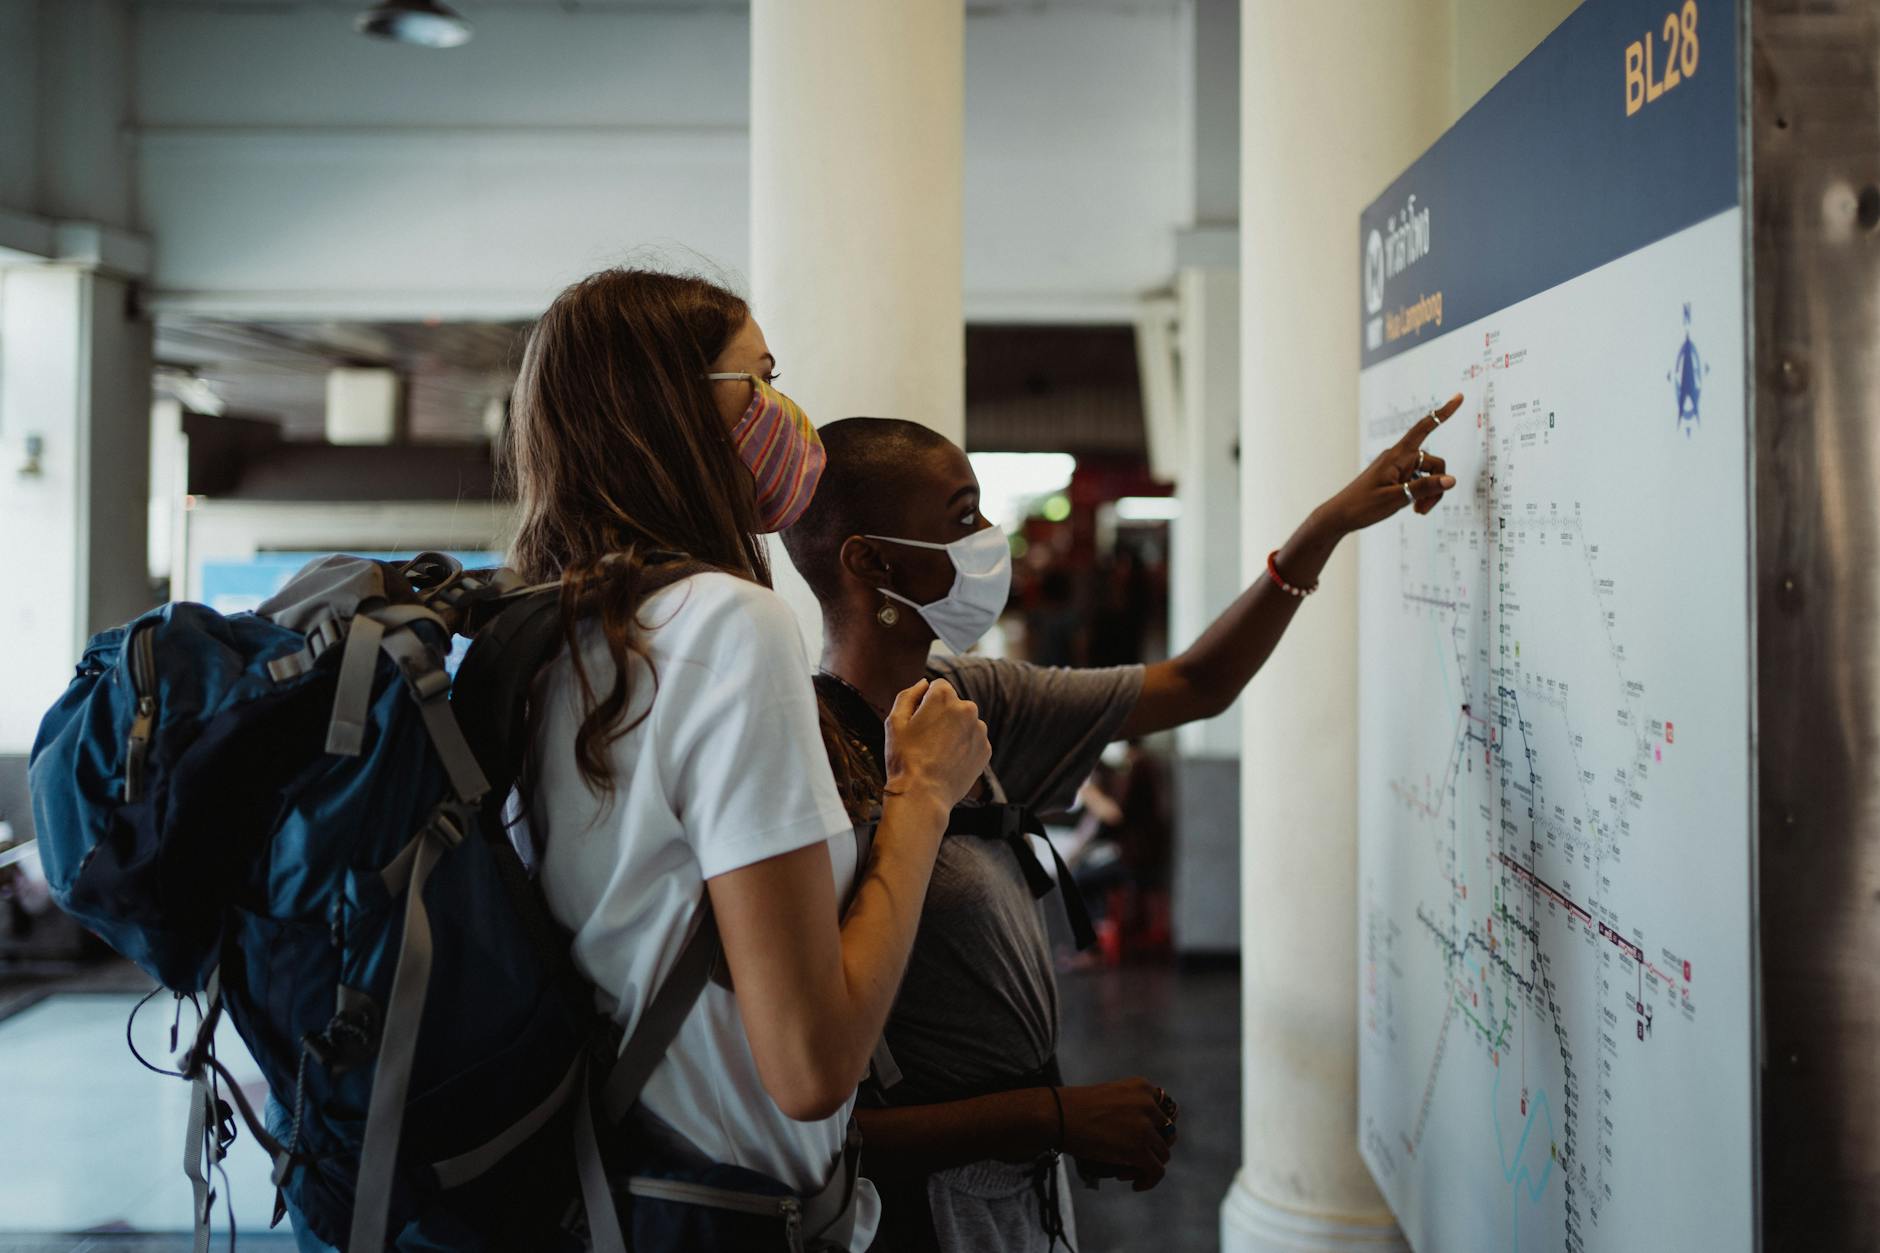
    Self-Guided Tour Apps

    Mobile apps with GPS-aware audio narration let you explore at your own pace.

    VanWalks (vanwalks.ca): Vancouver-specific app with curated walks of Gastown, Chinatown, Yaletown, West End. Free download with paid tour upgrades C$5-15.

    GPSmyCity: Global app with multiple Vancouver tour packages. Audio guides for Gastown, Chinatown, Stanley Park, and theme-based tours. Free trial; full version C$5-10/tour.

    AudioMe Tours: Audio-guided Gastown and Chinatown tour. Storytelling-focused approach with local recommendations for restaurants and shops along the route.

    Field Trip: Google’s discovery app surfaces points of interest near you. Less guided but useful for spontaneous exploration.

    Pros of self-guided: Move at your own pace; pause for coffee/photos; cheaper than guided.

    Cons: Less context than a knowledgeable live guide; no chance for follow-up questions; missed nuance.

    Hybrid approach: Take a paid guided tour first day to get context, then use apps on subsequent days for deeper neighborhood exploration.

    Walk Gastown
    Photo by Caio via Pexels. Gastown walking route — Steam Clock, Maple Tree Square, Trounce Alley.

    Gastown Walking Route

    Gastown is Vancouver’s oldest neighborhood and its most architecturally distinctive. The cobblestone streets, Victorian buildings, and cast-iron lampposts make for great walking.

    Recommended route (90 minutes):

    1. Steam Clock (Cambie/Water Streets) — Iconic landmark; whistles every 15 minutes. The starting point for most tours.
    2. Gassy Jack Statue (Maple Tree Square) — Vancouver’s “founder” John Deighton’s statue at the heart of original Gastown.
    3. Hotel Europe (43 Powell Street) — 1909 Edwardian flatiron building.
    4. Trounce Alley — Cobblestone laneway with high-end boutiques.
    5. Water Street boutiques — Local fashion (Roden Gray, Outpost), Aboriginal art galleries (Hill’s Native Art).
    6. Powell Street and Carrall Street — Historic buildings; Pidgin restaurant location.
    7. Carrall & Cordova — Hostel district; transition to Chinatown.
    8. Coffee at Revolver, Nemesis, or Pallet — Vancouver coffee culture exemplars.

    Eating & drinking stops: Steamworks Brewing (steam-powered brewery in heritage building), L’Abattoir (modern Canadian fine dining), Pidgin (Asian fusion), Tacofino (gourmet Mexican).

    Best time: 10 AM-4 PM weekdays for foot traffic without crowds. Friday-Saturday evenings get rowdy with bar-going crowds.

    Walk Chinatown
    Photo by Hub JACQU via Pexels. Chinatown walking route — Sun Yat-Sen Garden, Sam Kee Building.

    Chinatown Walking Route

    Vancouver’s Chinatown is the second-largest in North America after San Francisco’s. Historic buildings, herbalists, traditional restaurants, and Dr. Sun Yat-Sen Classical Chinese Garden anchor the walk.

    Recommended route (90 minutes-2 hours):

    1. Dr. Sun Yat-Sen Classical Chinese Garden (578 Carrall) — Authentic Ming dynasty-style garden. C$15 admission. The route’s anchor.
    2. Chinatown Memorial Plaza and Monument — Commemorating Chinese Canadians’ history and contributions.
    3. Pender Street main strip — Herbalists, traditional medicine shops, BBQ pork hanging in windows.
    4. Sam Kee Building (8 W Pender) — Genius World Records narrowest building (4 ft 11 in / 1.5 m wide).
    5. Chinatown Plaza Mall — Asian groceries and modern Chinese dining.
    6. Vancouver Chinatown Foundation Buildings — Showcasing historic structures and Chinese-Canadian heritage.
    7. Lunch at Bao Bei or Phnom Penh — Two of the best modern Asian restaurants on the strip.
    8. Foo’s Ho Ho or New Town Bakery — Old-school institutions for dim sum or steamed buns.

    Cultural context: Vancouver’s Chinatown was established in 1888 and has been a designated National Historic Site since 2010. The neighborhood faces ongoing gentrification challenges, but remains a vibrant cultural anchor.

    Best time: Morning (9-11 AM) for traditional shop activity; lunch (12-2 PM) for dim sum.

    Walk Yaletown
    Photo by The Six via Pexels. Yaletown and False Creek walking — heritage warehouses and seawall.

    Yaletown & False Creek Route

    Yaletown is the city’s converted warehouse district — heritage red-brick buildings now housing restaurants, boutiques, and condo developments. Adjacent False Creek seawall offers excellent walking.

    Recommended route (60-90 minutes):

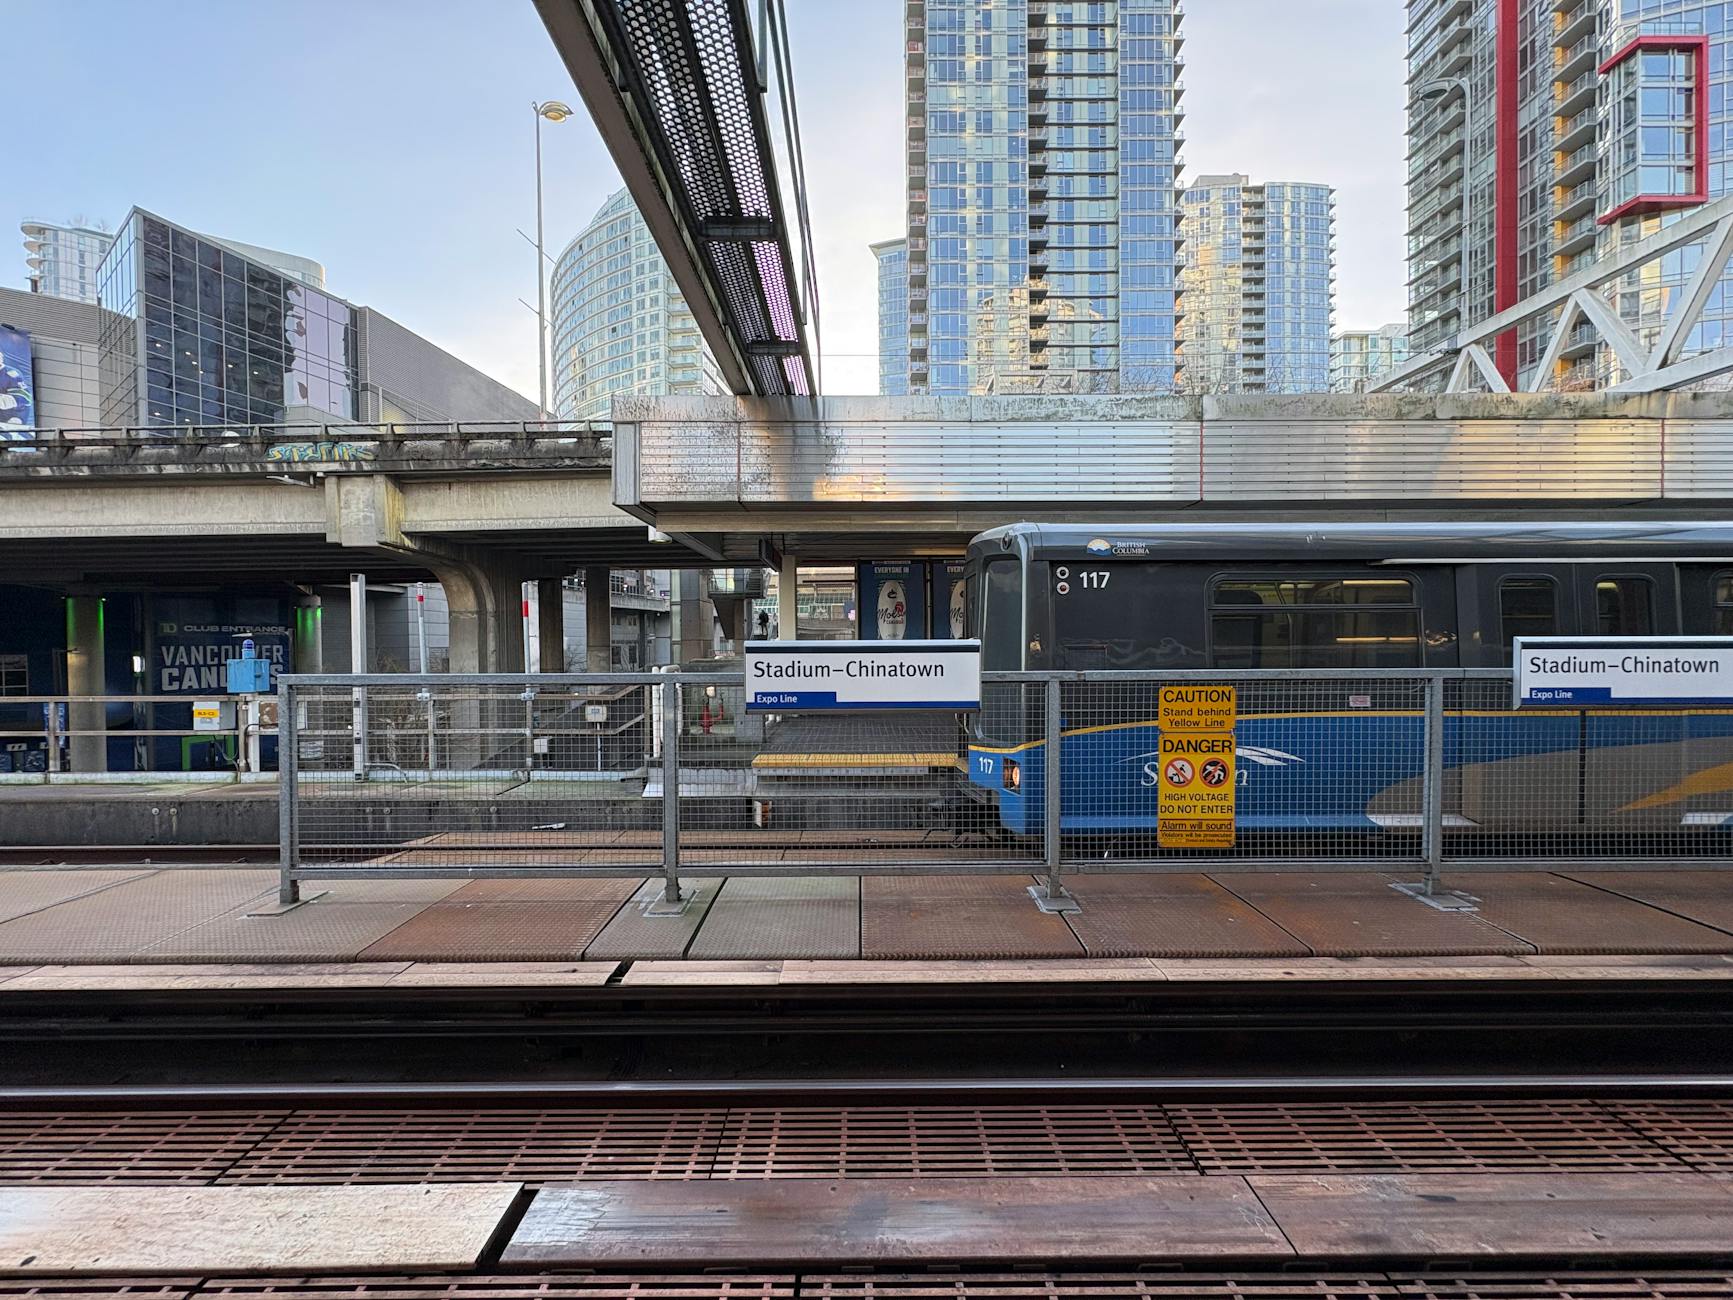
    1. Yaletown-Roundhouse SkyTrain Station (Davie Street) — Starting point.
    2. Roundhouse Community Arts & Recreation Centre — Historic 1888 railway roundhouse, now arts venue.
    3. Mainland Street boutiques — Heritage red-brick warehouses with boutiques and restaurants.
    4. Hamilton Street (the dining strip) — Multiple acclaimed restaurants (Blue Water Cafe, Cioppino’s, Hamilton Street Grill).
    5. David Lam Park — Green space with seawall access; excellent skyline views.
    6. False Creek Seawall — Walk west toward Granville Island bridge or east toward Olympic Village.
    7. Burrard Bridge — Cross to Kits Beach (additional 1 km walk; or stop here and return).

    Eating & drinking: Blue Water Cafe (high-end seafood), Hamilton Street Grill (steakhouse), Provence Marinaside (Mediterranean), Yaletown Brewing Company.

    Best time: Late afternoon (4-7 PM) for sunlight and pre-dinner atmosphere; weekend mornings for fewer crowds.

    Walk Stanley Park
    Photo by Judi Jutras via Pexels. Stanley Park walking loops — Seawall, forest interior trails.

    Stanley Park Walking Loops

    Stanley Park is 405 hectares — too big to walk entirely, but several walking-friendly sub-routes work well.

    Stanley Park Seawall (full loop, 9 km): 2.5-3 hours walking pace. Same route as the bike loop, walking on the outer pedestrian lane only.

    Stanley Park Loop highlights (shorter walks):

    • Coal Harbour to Brockton Point and back (3 km, 1 hour)
    • Lost Lagoon loop (2 km, 30 min)
    • Beaver Lake loop (2 km, 45 min)
    • Third Beach to Second Beach via Ferguson Point (2.5 km, 60 min)

    Forest interior trails: Several trails through the old-growth forest interior — Beaver Lake, Lost Lagoon, Lovers Walk, the Bridle Path. Quiet alternatives to the busy Seawall.

    Featured stops: Totem Poles (Brockton Point), 9 O’Clock Gun, Prospect Point Lookout, Hollow Tree, Siwash Rock, Stanley Park Pavilion.

    Walk West End
    Photo by Adi K via Pexels. West End and English Bay — leafy residential streets and beach.

    West End & English Bay

    The West End is downtown’s residential heart — leafy streets, historic mansions converted to apartments, and English Bay’s beach as the western boundary.

    Recommended route (60-90 minutes):

    1. Robson Square — Starting point; ice rink in winter.
    2. Robson Street west to Denman — International shopping, cafés.
    3. Denman Street — Restaurant row, casual dining.
    4. English Bay Beach — Beach with ocean views and sunset photo ops.
    5. Sylvia Hotel (1908) — Historic boutique hotel with iconic Tudor-revival architecture.
    6. Davie Street (LGBTQ+ Village) — Vibrant LGBTQ-friendly district with restaurants and shops.
    7. Roedde House Museum (Barclay Heritage Square) — Restored 1893 Queen Anne home.

    Best time: Late afternoon to sunset for English Bay’s main attraction. Davie Street comes alive evenings.
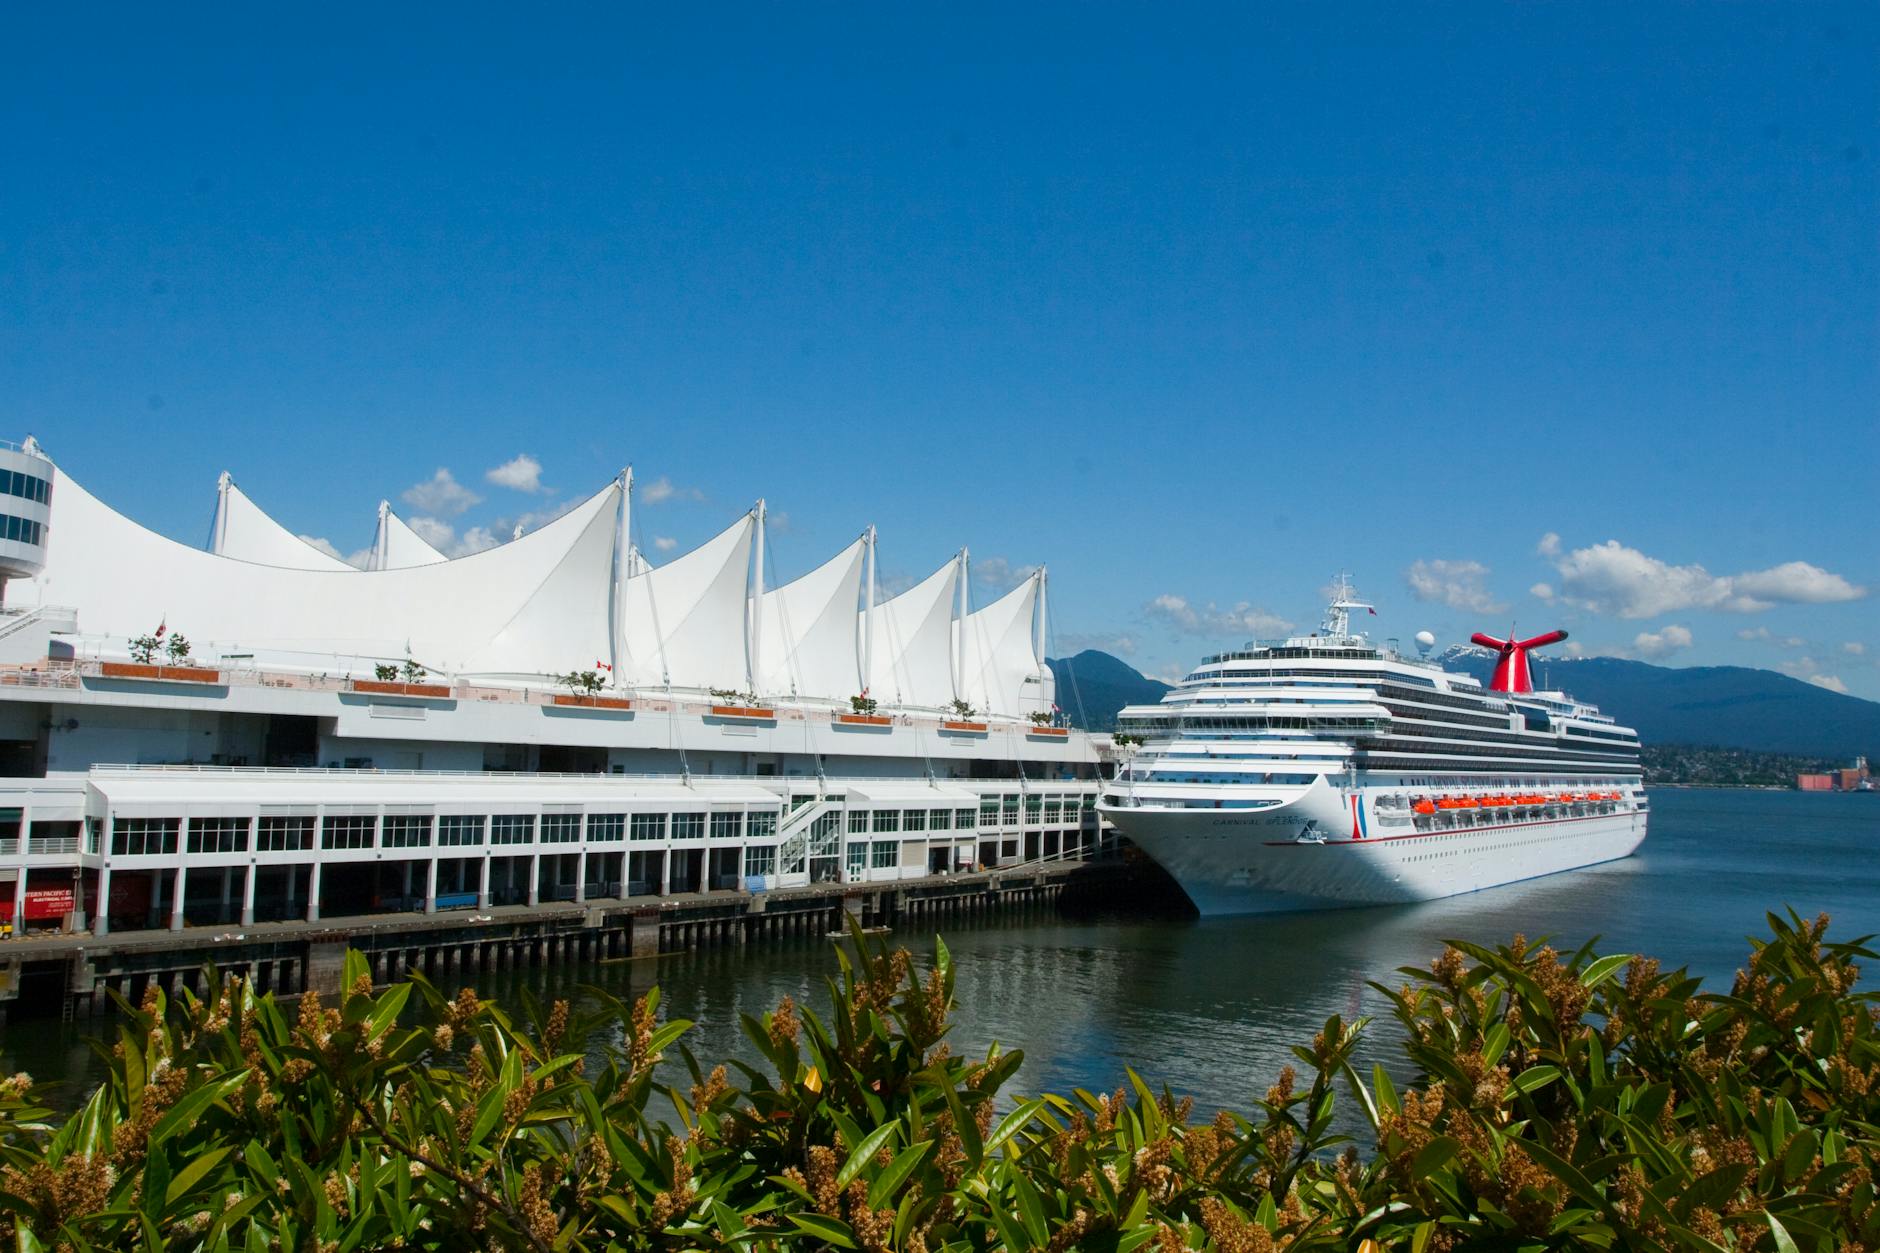
    Walk Granville Island
    Photo by Maceo Di Maria via Pexels. Granville Island walking — Public Market, Net Loft, Railspur District.

    Granville Island

    Granville Island is a converted industrial peninsula now full of artisan shops, restaurants, theatre, and the Public Market.

    Recommended walking route (2-3 hours):

    1. Public Market — 50+ food vendors, fresh produce, prepared foods.
    2. Net Loft — Crafts, jewelry, kitchen goods.
    3. Kids Market — 3-floor toy and play space (also good without kids; quirky).
    4. Granville Island Brewing — Tour and tasting (C$15).
    5. Railspur District — Glass blowing studios, ceramics, leather works.
    6. Boatyard — Historical Boatyard with wooden boats; tours periodically.
    7. Sandbar Restaurant — Seafood with patio seawall views.

    Best time: Weekday mornings (10 AM-noon) for easier market navigation; weekend afternoons for buzzing atmosphere.

    Walk Safety
    Photo by Erick Galván via Pexels. Walking safety — Vancouver is one of North America’s safest major cities.

    Safety & Areas to Know

    Vancouver is one of North America’s safest cities, but a few areas warrant awareness.

    Downtown Eastside (DTES): Concentrated around East Hastings between Carrall and Main Streets. The neighborhood has serious homelessness, addiction, and mental health issues. Visitors are not targeted but the visual reality can be confronting. The standard advice: don’t carry valuables visibly, walk in groups after dark, take a taxi or transit through rather than stopping.

    What’s safe and visited daily:

    • Gastown (which borders the DTES on its east side; touristy and well-policed)
    • All other downtown neighborhoods (Yaletown, Coal Harbour, West End, Robson)
    • Stanley Park, Granville Island, Kitsilano, UBC peninsula
    • Late-night transit (well-lit, monitored)

    Common precautions:

    • Don’t display expensive jewelry, cameras, or phones on public transit
    • Use rideshare or taxi after midnight if walking long distances
    • Park rental cars in attended garages, not street
    • Travel in groups in less-frequented areas after dark
    • Trust your instincts — if a street feels off, take a different route

    Emergency: 911 for police, fire, ambulance. Non-emergency police: 604-717-3321.

    Walk Faqs
    Photo by Ivan S via Pexels. Common questions about walking tours — duration, tips, safety.

    Walking Tours Vancouver FAQs

    Are walking tours of Vancouver safe?
    Yes — Vancouver is consistently rated among North America’s safest cities. Standard urban precautions apply.

    What’s the best free walking tour in Vancouver?
    Forbidden Vancouver’s “The Lost Souls of Gastown” is a fan favorite. Tour Guys also offers solid free tours of Gastown and Granville Island.

    How long are walking tours typically?
    2-3 hours covering 2-3 km. Self-guided routes can be flexed shorter or longer.

    Should I tip free tour guides?
    Yes — typical tips are C$15-20 per person. Free tours are how guides make their living.

    Can I do walking tours in winter?
    Yes. Vancouver’s mild winter (avg high 7°C) is comfortable for walking with proper rain gear.

    What’s the most walkable Vancouver neighborhood?
    Gastown for character, West End for residential charm, Yaletown for modern restaurants and architecture.

    Are there walking tours focused on Indigenous history?
    Yes — Talaysay Tours offers Indigenous-led walking tours of Stanley Park covering Squamish, Tsleil-Waututh, and Musqueam history.

    Related reading: Pair this with our Gastown guide, biking guide, and Vancouver with kids.

  • Biking in Vancouver: Best Routes, Bike Shares & Rentals (2026)

    Biking in Vancouver: Best Routes, Bike Shares & Rentals (2026)

    Hero Biking
    Photo by Travis Kerkvliet via Pexels. Biking Vancouver — the 28-km Seawall is the world’s longest urban bike path.

    Biking in Vancouver is one of the city’s signature experiences. The 28-km Seawall is the world’s longest uninterrupted waterfront cycling path, the protected bike lane network spans 450+ km of separated and traffic-calmed routes, and the public Mobi bike share has 250+ stations across the city. Bike rental shops cluster around Stanley Park’s entrances renting everything from cruisers to tandems to electric bikes.

    This guide is the visitor’s playbook: the routes worth riding, where to rent, what to know about the Seawall’s strict counter-clockwise rule, plus tips for chain trips like Stanley Park + Kits Beach + Granville Island in a half-day.

    Bk Overview
    Photo by Ekaterina Belinskaya via Pexels. Vancouver biking quick facts — 450+ km bike network, 130 km separated lanes.

    Biking Vancouver: Quick Visitor Facts

    • Vancouver Seawall: 28 km uninterrupted waterfront path — world’s longest
    • Stanley Park Loop: 9 km counter-clockwise on dedicated bike-only path
    • Bike network: 450+ km of bike lanes citywide, including 130 km of protected/separated lanes
    • Helmets required by law for all ages in BC
    • Rental cost: ~C$10/hour for cruisers; C$15-20/hour for performance bikes; C$50-80/day
    • Mobi public bike share: 250+ stations; pay-by-minute or day-pass
    • Best season: April-October for warm dry weather; year-round riding possible with rain gear
    Bk Seawall
    Photo by Zekai Zhu via Pexels. The Vancouver Seawall — 28 km uninterrupted from Convention Centre to Spanish Banks.

    The Seawall: World’s Best Urban Bike Path

    The Vancouver Seawall is the city’s signature engineering achievement — a 28-km continuous paved path along the waterfront that runs from the Vancouver Convention Centre, around Stanley Park, along English Bay, around False Creek, and ending at Spanish Banks Park.

    Major Seawall sections (south to north):

    1. Spanish Banks to Jericho Beach (3 km): Wide promenade with Pacific views
    2. Jericho Beach to Vanier Park (3 km): Past Locarno, Spanish Banks West
    3. Vanier Park to Granville Bridge (1.5 km): Maritime Museum, Kits Beach
    4. Granville Bridge to Cambie Bridge (3 km): Granville Island, Yaletown south, Olympic Village
    5. Cambie Bridge to Science World (1.5 km): East end of False Creek
    6. Science World to Coal Harbour (3 km): Olympic Village, Yaletown north, downtown
    7. Coal Harbour to Stanley Park (1.5 km): Convention Centre, Stanley Park entrance
    8. Stanley Park Loop (9 km): Counter-clockwise around the park
    9. English Bay to Vanier Park (2 km): Beach Avenue, Sunset Beach

    Critical rule: The Seawall has separate lanes — pedestrians on the outside (water side), cyclists/skaters on the inside (land side). Always ride in the bike lane.

    Direction: The Stanley Park section is one-way counter-clockwise for cyclists. Other sections are bidirectional.

    Bk Stanley Park
    Photo by Judi Jutras via Pexels. Stanley Park bike loop — 9 km counter-clockwise on dedicated bike path.

    Stanley Park Bike Loop (9 km)

    The Stanley Park Seawall is Canada’s most popular bike route — millions of riders complete the 9-km loop annually. It takes most casual riders 60-90 minutes including stops.

    Direction: Counter-clockwise only on the bike path (mandatory). Riding clockwise is a ticketable offense and dangerous given two-way pedestrian traffic.

    Major sights along the loop (in order):

    1. Coal Harbour Marina (start)
    2. Brockton Point Lighthouse and 9 O’Clock Gun
    3. Totem Poles at Brockton Point
    4. Lions Gate Bridge underneath
    5. Prospect Point lookout
    6. Third Beach
    7. Siwash Rock
    8. Second Beach
    9. English Bay Beach
    10. Loop completes at Stanley Park entrance

    Time: 45 minutes minimum non-stop; 90 minutes-2 hours typical with photo and rest stops. Allow 2.5-3 hours if combining with seawall extensions or museums.

    Difficulty: Mostly flat with one short climb near Prospect Point. Suitable for casual riders, families with kids 8+, and seniors.

    Weather considerations: Avoid in heavy rain (wet seawall is slippery). Pleasant in light rain with good gear. Spectacular on cool clear winter mornings.

    Bk Routes
    Photo by K via Pexels. Best routes beyond Stanley Park — Kits Beach Loop, False Creek, Spanish Banks.

    Best Routes Beyond Stanley Park

    1. Kitsilano Beach Loop (8 km): Burrard Bridge → Vanier Park → Kits Beach → Jericho Beach → return. Mostly Seawall; a few road sections. 45-90 minutes.

    2. False Creek Loop (10 km): Coal Harbour → Stanley Park entrance → English Bay → Sunset Beach → Aquatic Centre → Yaletown → Olympic Village → Science World → return via north side. 60-90 minutes.

    3. Spanish Banks Round Trip (16 km): Stanley Park → English Bay → Vanier Park → Kits → Jericho → Locarno → Spanish Banks. Pacific views; UBC nearby. 90 minutes-2 hours.

    4. UBC Campus Loop (14 km): Through Pacific Spirit Park’s car-free road network. Quiet, treed, university campus + Wreck Beach (clothing optional, FYI).

    5. North Shore via Lions Gate Bridge (Advanced): Stanley Park → cross Lions Gate Bridge → Capilano River Park or Ambleside. Steep grades; experienced riders only.

    6. Adanac Bike Route (10 km): Cycling-priority east-west route through East Vancouver to PNE/Hastings Park. Quiet residential streets.

    7. Central Valley Greenway (24 km one-way): Off-road regional path connecting Vancouver to New Westminster. Quiet, scenic, great for half-day adventure.

    Bk Rentals
    Photo by Joaquin Carfagna via Pexels. Bike rental shops cluster around Stanley Park entrances.

    Where to Rent a Bike

    Vancouver has dozens of bike rental shops, mostly clustered around Stanley Park entrances.

    Cycle City Tours (cyclevancouver.com): Multiple downtown locations. Rentals + guided tours. Cruisers, hybrids, electric bikes, tandems.

    Spokes Bicycle Rentals (spokesbicyclerentals.com): Right at the Stanley Park entrance. The biggest selection. Cruisers, hybrids, mountain bikes, tandems, kids’ bikes, trailers.

    Bayshore Bike Rentals: Near Coal Harbour Seawall start. Smaller shop with personalized service.

    Cycle BC Rentals & Tours: Robson Street location. Mix of cruisers and performance bikes.

    Toonie Tours: Self-guided tours with audio tracks; rentals included.

    Standard rates (2026):

    • Cruiser: C$10-15/hour, C$40-60/day
    • Hybrid: C$12-18/hour, C$50-70/day
    • Electric bike: C$20-30/hour, C$70-90/day
    • Tandem: C$25-35/hour, C$80-100/day
    • Kids’ bike: C$8-12/hour, C$30-45/day
    • Helmet (required): typically included
    • Lock: typically included

    Booking: Walk-in works most days; reservations recommended for weekends April-October and any electric bike rental.

    Bk Mobi
    Photo by Negative Space via Pexels. Mobi by Shaw Go — 250+ stations of public bike share.

    Mobi Bike Share for Visitors

    Mobi by Shaw Go is Vancouver’s public bike share — 250+ stations, 2,000+ bikes. Best suited to short trips under 30 minutes.

    How it works:

    1. Download the Mobi by Shaw Go app
    2. Create an account with credit card
    3. Find a station, scan a bike
    4. Ride to your destination
    5. Dock at any station

    Pricing:

    • 24-hour pass: C$15 unlimited 30-min rides
    • 3-day pass: C$30 unlimited 30-min rides
    • 30-day membership: C$26 (good if living locally)
    • Per-trip overage: C$5 per 30 minutes beyond included time

    Strengths: Cheap for short trips; widely available stations; no need to lock or worry about theft.

    Weaknesses: Bikes are basic 3-speed cruisers; uncomfortable for long rides; not ideal for hilly routes (UBC, North Shore).

    When Mobi makes sense: Quick downtown crossings, hotel-to-meeting commutes, single-stop tourist hops (e.g., hotel to Granville Island).

    When traditional rentals make sense: Stanley Park loop, half-day or full-day rides, performance bikes, comfort matters.

    Bk Types
    Photo by Marcelo Gonzalez via Pexels. Choosing the right bike — cruiser, hybrid, electric, mountain, or tandem.

    Choosing the Right Bike

    Cruiser (most common rental): Upright posture, soft seat, 1-3 speeds. Comfortable for Seawall and flat city rides. Not ideal for hills or distance over 20 km.

    Hybrid: More gears (7-21), upright posture, slightly firmer seat. Better for longer rides and gentle hills. Good all-purpose choice.

    Electric (e-bike): Pedal-assist motor extends your range and tackles hills. Worth the premium for trips to UBC, North Shore, or anywhere with elevation. Allowed in bike lanes if Class 1 (pedal-assist only, max 32 km/h).

    Mountain bike: Wider tires, suspension. Useful only for North Shore mountain biking trails (Mt. Seymour, Cypress, North Shore tech trails).

    Tandem: Two-rider bike. Fun for couples; awkward for first-timers. Practice in a parking lot before hitting the Seawall.

    Kids’ bikes and trailers: Available at major rental shops. Trailer attaches to adult bike for kids too small to pedal.

    Bk Rules
    Photo by Atlantic Ambience via Pexels. Vancouver bike rules — counter-clockwise on Stanley Park, helmet required by BC law.

    Rules of the Road

    Vancouver enforces cycling laws actively, with some unique local rules.

    Universal BC rules:

    • Helmets required for all riders, all ages (Bicycle Safety Act)
    • Bike lights required at night (front white, rear red)
    • Reflectors required (most rental bikes have them)
    • Stop at stop signs and red lights
    • Yield to pedestrians at all intersections
    • Hand signals for turns

    Vancouver-specific:

    • Stanley Park Seawall is one-way counter-clockwise for bikes
    • Outer lane is for pedestrians only — never ride there
    • Yield to people walking even on bike paths
    • No riding on most sidewalks (except where signed)
    • Bike on the right side of the road in traffic
    • Don’t lock bikes to fences or street furniture (tickets)

    Common ticket triggers: Riding clockwise on Stanley Park Seawall, riding without a helmet, running red lights, riding on inappropriate sidewalks.

    Bk Helmets
    Photo by Mario Amé via Pexels. Helmets required by BC law for all riders regardless of age.

    Helmets & Safety

    BC’s helmet law applies to all riders regardless of age, and is enforced — fines C$29-100.

    Rental helmets: Always included (no extra fee). Generally well-fitted; ask staff for adjustment.

    Bringing your own helmet: Allowed and encouraged. Better fit, often lighter weight.

    Helmet fit basics: Sits level on head (not tilted back); two fingers above eyebrows; straps form V under ears; chinstrap snug enough that one finger fits underneath.

    Other safety basics:

    • Bike lights front and rear (rentals usually include these)
    • Bell or horn (BC law)
    • Bright clothing or hi-vis vest (especially in fall/winter rain)
    • Spare inner tube and pump for longer rides (rental shops can provide)
    • Phone with app for emergencies (Vancouver has 911)
    Bk Itineraries
    Photo by Travis Kerkvliet via Pexels. Sample half-day biking itineraries — Stanley Park Loop, Beach-to-Beach.

    Sample Half-Day Bike Itineraries

    Classic Stanley Park Loop (2.5 hours): Rent at Spokes (Denman Street). Coal Harbour Seawall → Stanley Park entrance → counter-clockwise loop with stops at Brockton Point, Prospect Point, Third Beach. Return via English Bay. Lunch at Stanley’s Park Bar & Grill at Second Beach.

    Beach-to-Beach (3 hours): Rent at Spokes. Stanley Park entrance → English Bay → Sunset Beach → cross Burrard Bridge → Vanier Park → Kits Beach. Coffee at Kitchen Table Restaurants. Return via the same route.

    Granville Island Loop (3.5 hours): Rent at Cycle BC (Robson). Coal Harbour Seawall → Stanley Park entrance → English Bay → Aquatic Centre → cross Burrard Bridge → Granville Island. Lock bikes for 60-90 minute Granville Island visit. Return via Cambie Bridge.

    Spanish Banks Adventure (4 hours): Rent at Spokes. Stanley Park → English Bay → Vanier Park → Kits Beach → Jericho → Spanish Banks. Picnic at Spanish Banks. Return via the same route.

    UBC Adventure (5 hours, e-bike recommended): Rent e-bike at Cycle City. Spanish Banks → UBC campus → Wreck Beach (steep stairs to beach). Lunch at UBC Sage Bistro. Return via Pacific Spirit Park trails.

    Bk Electric
    Photo by Team EVELO via Pexels. E-bikes — extend your range and tackle hills.

    Electric Bikes & Tour Options

    Electric bikes have transformed Vancouver cycling for visitors. Pedal-assist motors flatten hills and extend range significantly.

    Best e-bike use cases:

    • UBC + Spanish Banks loop (steep climbs)
    • North Shore via Lions Gate Bridge
    • Long-distance Seawall + False Creek combinations
    • Riders who want to enjoy scenery without exertion
    • Older riders or those with knee/joint issues

    E-bike rental cost: C$70-90/day vs. C$50-70 for hybrid. Worth the premium for hilly routes or longer rides.

    Guided bike tours: Several companies offer 2-4 hour guided tours combining riding with local history.

    • Cycle City Tours: Granville Island Tour, Stanley Park Tour, Craft Beer Tour
    • Vancouver Bicycle Tours: Sunset Cruise, Foodie Tour
    • Toonie Tours: Self-guided audio tours starting at C$40 for the bike rental + tour guide audio
    Bk Faqs
    Photo by Mustata Silva via Pexels. Common questions about Vancouver biking — helmet law, rental cost, best routes.

    Biking Vancouver FAQs

    Is biking in Vancouver safe?
    Yes — Vancouver consistently ranks among North America’s safest cycling cities thanks to its protected lane network. Standard urban precautions apply.

    Do I need a helmet to ride in Vancouver?
    Yes — BC law requires helmets for all cyclists regardless of age. Rentals include helmets.

    How much does it cost to bike Stanley Park?
    About C$10-20 to rent a cruiser or hybrid for the 1-2 hour loop, plus optional snack/lunch stops.

    Can I bike from Vancouver to North Shore?
    Yes via Lions Gate Bridge (a separated bike path). Steep grades — best suited to confident cyclists or those on e-bikes.

    What’s the best route for a first-time visitor?
    Stanley Park’s 9-km Seawall loop. Flat, scenic, well-marked, separated from cars.

    Is Mobi worth it for tourists?
    For short downtown hops, yes (C$15 day pass). For longer rides like Stanley Park, traditional rentals offer more comfortable bikes.

    Are bike paths separated from car traffic?
    Most major routes are, including the Seawall, Burrard Bridge, Hornby Street, Dunsmuir Street, and 10th Avenue.

    Related reading: Pair this with our Stanley Park guide, Granville Island guide, and walking tours guide.

  • Aquabus & False Creek Ferries Guide (2026)

    Aquabus & False Creek Ferries Guide (2026)

    Hero Aquabus
    Photo by Wolfgang Weiser via Pexels. Aquabus and False Creek Ferries — colorful mini ferries serving False Creek.

    Aquabus Vancouver and False Creek Ferries are the two private mini-ferry companies serving False Creek — the inlet that bisects Vancouver between downtown, Olympic Village, and Granville Island. The colorful little boats are technically transportation, but for visitors they’re really one of the city’s signature experiences: a 5-minute hop across the harbor, $5-10 a ride, that turns Granville Island into a destination accessible from anywhere along the waterfront.

    This guide covers both Aquabus (the rainbow-colored fleet) and False Creek Ferries (the blue and white fleet), how they differ, where each one stops, fares, the best ride for sightseeing, and everything visitors need to know — including the critical fact that these are NOT covered by your TransLink Compass Card.

    Ab Overview
    Photo by Glen Zi 加侖子 via Pexels. Quick facts about Aquabus and False Creek Ferries — 5-min crossings, $4-12 per ride.

    Aquabus & False Creek Ferries: Quick Visitor Facts

    • Two competing private ferry companies serving False Creek — Aquabus (rainbow colors) and False Creek Ferries (blue and white)
    • NOT included in TransLink Compass Card — pay the operator directly
    • Crossing time: 3-7 minutes between most stops
    • Fares: ~C$4-12 per ride depending on company and route
    • Service area: False Creek inlet between downtown, Yaletown, Olympic Village, Science World, and Granville Island
    • Hours: ~6:45 AM-9:30 PM daily, year-round
    • Frequency: Every 5-15 minutes
    Ab Aquabus
    Photo by Mohammadreza Dehghanpour via Pexels. Aquabus operates 17 rainbow-colored mini ferries since 1984.

    Aquabus: The Rainbow Fleet

    Aquabus operates 17 brightly-colored mini-ferries — the rainbow boats that have become a Vancouver postcard fixture.

    Founded: 1984 (one of the original False Creek ferry operators).

    Fleet: 17 vessels, 12-passenger capacity each (plus boat operator). Several larger 24- and 30-passenger vessels.

    Hours: 7:00 AM-9:15 PM, 7 days a week year-round.

    Frequency: Every 15 minutes or less on most routes during operating hours.

    Aquabus stops:

    1. Hornby Street (downtown): Foot of Hornby Street near the Vancouver Aquatic Centre
    2. Granville Island: Aquabus dock at the southwest corner
    3. Yaletown (Davie Street): Davie Street next to David Lam Park
    4. Stamps Landing: South side of False Creek
    5. Spyglass: South side, near Olympic Village
    6. Plaza of Nations: North side near BC Place
    7. The Village (Olympic Village): South side at the Olympic Village waterfront
    8. Science World: East end of False Creek, adjacent to Science World

    Distinguishing features: The rainbow colors are the giveaway. Boats have indoor seating, outdoor deck access, and a small captain’s wheelhouse.

    Ab Fcf
    Photo by Wolfgang Weiser via Pexels. False Creek Ferries — the blue and white fleet operating since 1982.

    False Creek Ferries: The Blue & White Fleet

    False Creek Ferries operates the blue-and-white mini-ferries — fewer in number but with broader coverage westward toward English Bay.

    Founded: 1982 (the older of the two operators).

    Fleet: Small fleet (around 5-8 vessels) of 12-passenger ferries.

    Hours: ~6:45 AM to 9:30 PM daily.

    Frequency: Every 12-15 minutes typically.

    False Creek Ferries stops:

    1. Aquatic Centre (downtown): Same area as Aquabus’s Hornby stop
    2. Granville Island: Public Market dock
    3. Vanier Park: West side of False Creek; gateway to Maritime Museum, Space Centre, Museum of Vancouver
    4. Stamps Landing
    5. Yaletown: David Lam Park dock
    6. Plaza of Nations
    7. Olympic Village (The Village dock)
    8. Spyglass Place
    9. Science World

    Key advantage: False Creek Ferries serves Vanier Park (Maritime Museum, Space Centre), which Aquabus does not.

    Ab Comparison
    Photo by Güven Gök via Pexels. Aquabus vs. False Creek Ferries — similar service, separate ticketing.

    Aquabus vs. False Creek Ferries: Which to Choose

    Both operators are well-run and similar in cost. The choice usually comes down to where you want to go.

    Choose Aquabus when:

    • You’re staying in downtown west or Yaletown (more frequent service to Hornby/Davie)
    • You want the iconic rainbow-boat experience for photos
    • You’re heading to Olympic Village or Science World
    • You want the most stops along False Creek

    Choose False Creek Ferries when:

    • You’re heading to or from Vanier Park (Maritime Museum, Space Centre)
    • You want connection to Kits Beach via short walk from Vanier Park
    • You’re already on the False Creek Ferries dock at one stop

    Key fact: Tickets are NOT interchangeable. If you board an Aquabus, your ticket only works on Aquabus. False Creek Ferries tickets only work on False Creek Ferries.

    Pragmatic advice: Most visitors take whichever boat arrives first. The two companies share most stops, so you’ll often see one boat from each docked simultaneously.

    Ab Fares
    Photo by Yunus Kılıç via Pexels. Mini ferry fares — C$4.50-7.00 adult; day passes C$18.

    Fares & Tickets

    Both companies set their own fares, which are similar.

    Aquabus fares (2026):

    • Adult one-way: C$4.50-C$7.00 (depends on route distance)
    • Children, seniors: C$2.75-C$4.00
    • Day pass (unlimited Aquabus): C$18 adult / C$13 senior/child
    • Family Day Pass (2 adults + 2 kids): C$45

    False Creek Ferries fares (2026):

    • Adult one-way: C$4.50-C$8.00
    • Children, seniors: C$2.75-C$4.50
    • Day pass: ~C$18

    How to pay: Cash, credit card, or debit at the dock office or onboard. Most tickets are now sold via mobile app or contactless payment for faster boarding.

    What’s NOT covered:

    • TransLink Compass Card (not interchangeable)
    • SkyTrain/SeaBus transfers (separate fare system)
    • Bus transfers (separate)

    Tipping: Not expected; some passengers tip operators C$1-2 for friendly service.

    Ab Stops
    Photo by Zeynep Sude Emek via Pexels. Mini ferry stops — Hornby, Yaletown, Granville Island, Olympic Village, Science World.

    All Stops Mapped

    The two services overlap on most stops but each has unique destinations.

    Stops served by both:

    • Hornby Street / Aquatic Centre (downtown west)
    • Yaletown / Davie Street
    • Granville Island
    • Stamps Landing
    • Olympic Village / The Village
    • Science World
    • Plaza of Nations
    • Spyglass Place

    Aquabus only: Yaletown north dock (more central than Davie), additional Plaza of Nations docks.

    False Creek Ferries only: Vanier Park (Maritime Museum, Space Centre).

    Ab Routes
    Photo by Erik Mclean via Pexels. Most popular routes — Hornby to Granville Island and Olympic Village to Granville Island.

    Routes & Most-Used Connections

    The most popular tourist routes:

    Hornby/Aquatic Centre → Granville Island: The classic 5-minute crossing. Roughly 3 km by water vs. 30+ minute walk. C$4.50.

    Yaletown → Granville Island: 6-minute crossing. Popular with Yaletown hotel guests. C$4.50-5.50.

    Olympic Village → Granville Island: 8-minute crossing. C$5.50-6.50.

    Science World → Granville Island: 10-minute crossing through the entire length of False Creek. C$6.50-7.50.

    Vanier Park ↔ Granville Island (False Creek Ferries only): 4-minute crossing. Useful for Maritime Museum visitors.

    Loop tour routes: Both companies offer “False Creek Loop” tickets — board at any stop, ride the entire loop, return to start. Aquabus loop ticket: C$18.

    Ab Mini Tours
    Photo by Jay Ngai via Pexels. Mini ferries offer scenic loop tours of False Creek.

    Mini Tour Itineraries

    Make the ferries themselves the attraction.

    30-minute False Creek Loop (Aquabus): Board at Hornby. Ride all the way to Science World (~12 min). Return via the south side stops to Hornby (~12 min). Total: ~30 minutes, C$18 day pass.

    2-hour Granville Island combo: Hornby → Granville Island (5 min). 90-minute market browse. Granville Island → Yaletown (6 min). Walk Yaletown. Total round trip: ~2 hours, ~C$10.

    3-hour culture combo (False Creek Ferries): Hornby → Vanier Park (~10 min). Maritime Museum + Space Centre + Vancouver Museum (90 min). Vanier Park → Granville Island (4 min). Lunch at Granville Island Public Market (60 min). Granville Island → Hornby (5 min).

    Sunset photo run: Board Hornby at 30 min before sunset. Ride to Science World looking west the whole way. Disembark, walk back along Cambie Bridge or Olympic Village seawall. Stunning sunset photography.

    Ab Granville Island
    Photo by Maceo Di Maria via Pexels. Granville Island is the top destination for both ferry operators.

    Granville Island Connections

    Granville Island is the single most popular destination served by both ferry companies. The island itself isn’t really an island — it’s a peninsula connected to the south side of False Creek by a single road, but the ferries make access from downtown vastly more pleasant than the bridge route.

    Why visitors take ferries to Granville Island:

    • Public Market with 50+ food vendors and crafts stalls
    • Net Loft craft district
    • Granville Island Brewing tour
    • Kids Market (3 floors of toys and play)
    • Granville Island Theatre and live music venues
    • Artisan studios and galleries

    Visitor flow: Most visitors arrive by ferry at the Public Market dock (False Creek Ferries) or Aquabus dock (~5 minute walk from Public Market). Both drop you within 200m of the market entrance.

    Best half-day plan: Ferry over morning. Public Market browse + lunch. Walk to Net Loft for shopping. Granville Island Brewing tour. Ferry back via different stop than arrival to vary the route.

    Ab Pets Bikes
    Photo by Lally Zwetzch via Pexels. Both companies welcome pets, bikes, and strollers.

    Pets, Bikes, and Strollers

    Both ferry companies are friendly toward extras.

    Pets: Allowed on both Aquabus and False Creek Ferries. Pets must be leashed or in a carrier. Operators are pet-friendly; small dogs are common passengers.

    Bicycles: Both companies accept bikes for an additional small fee (typically C$1.50-2.50). Aquabus has dedicated bike racks on most boats; False Creek Ferries handles bikes on a space-available basis.

    Strollers: Welcome on all boats. Designated stroller spaces; operator will help if needed. Strollers don’t need to be folded.

    Wheelchair accessibility: Limited. Most ferry docks are accessible via ramps, but boarding the boats requires a small step. Travelers with mobility limitations should check with the operator before boarding.

    Ab Photography
    Photo by Zeynep Sude Emek via Pexels. Photographing the rainbow Aquabus and blue False Creek ferries.

    Best Photo Opportunities

    The mini-ferries themselves are photo-worthy, and the False Creek perspective offers downtown views you can’t get elsewhere.

    Iconic shots:

    • Aquabus rainbow boat passing in front of downtown skyscrapers (from Hornby dock)
    • False Creek Ferries blue boats with Granville Island Public Market behind
    • Sunset over Cambie Bridge from any boat heading west
    • Reflections of boats on calm morning water (best 7-9 AM)
    • Spirit of False Creek decorated boats during festivals

    Best photo positions:

    • Outside on the open deck (allowed on most boats)
    • Front bench seat for forward-facing shots
    • Boarding the boat from the dock allows close-up exterior photography

    Time-of-day notes:

    • Morning (7-9 AM): Soft light, fewer crowds, best for clean exterior shots
    • Mid-day: Good for showing the busy waterfront atmosphere
    • Sunset: Magic-hour light on water and boats
    • Blue hour (30 min after sunset): Boat lights illuminated; downtown lights on
    Ab Faqs
    Photo by The Six via Pexels. Common questions — Compass Card not accepted; tickets not interchangeable.

    Aquabus & False Creek Ferries FAQs

    Are Aquabus and False Creek Ferries the same company?
    No. They are competing private operators serving overlapping routes in False Creek. Tickets are not interchangeable.

    Can I use my Compass Card on Aquabus or False Creek Ferries?
    No. These are private companies separate from TransLink. Compass Card does not work; pay the operator directly.

    How much does the Aquabus cost?
    C$4.50-7.00 adult one-way depending on route. Day pass C$18.

    Does the Aquabus go to Stanley Park?
    No. Aquabus and False Creek Ferries serve only False Creek (between downtown and Granville Island/Olympic Village/Science World). Stanley Park is on Burrard Inlet, not False Creek.

    Can I bring my bike on the Aquabus?
    Yes. Small additional fee; bike racks available on most boats.

    Are the ferries heated in winter?
    Yes. Both Aquabus and False Creek Ferries operate year-round with heated indoor cabins.

    Where do the ferries dock at Granville Island?
    Both operators have dedicated docks: Aquabus at the southwest corner near the Public Market; False Creek Ferries at the Public Market dock. Both within 200m of the market entrance.

    Related reading: Pair this with our Granville Island guide, transportation pillar, and SeaBus guide.

  • Vancouver SeaBus: Downtown to North Vancouver the Scenic Way (2026)

    Vancouver SeaBus: Downtown to North Vancouver the Scenic Way (2026)

    Hero Seabus
    Photo by Alex MinKoo Kim via Pexels. Vancouver SeaBus — 12-minute scenic crossing of Burrard Inlet.

    The Vancouver SeaBus is the most underrated experience on the city’s transit system — a 12-minute catamaran crossing of Burrard Inlet that doubles as a working commuter ferry and a $2.70 mini-cruise. The two ships (Burrard Otter II and Burrard Chinook) connect Waterfront Station downtown to Lonsdale Quay in North Vancouver every 10-15 minutes during the day, included in your regular transit fare.

    For visitors, the SeaBus unlocks the entire North Shore — Lonsdale Quay’s market, Capilano Suspension Bridge connections, Grouse Mountain access, Lynn Canyon, and the cafes and restaurants of Lower Lonsdale. It’s also one of the city’s best photo opportunities, with Burrard Inlet panoramas, downtown skyline, mountains, and harbor traffic all visible from the seats.

    Sb Overview
    Photo by Elif Kizil via Pexels. SeaBus quick facts — 12 min crossing, every 10-15 minutes, included in transit fare.

    Vancouver SeaBus: Quick Visitor Facts

    • Crossing time: 12 minutes Waterfront ↔ Lonsdale Quay
    • Distance: 3.7 km across Burrard Inlet
    • Fleet: Two 400-passenger catamarans (Burrard Otter II and Burrard Chinook)
    • Frequency: Every 10 minutes peak; 15 minutes off-peak; 30 minutes evenings
    • Hours: 6:00 AM-1:00 AM Monday-Saturday; 8:00 AM-11:00 PM Sundays/holidays
    • Fare: C$2.70 stored value (one-zone after 6:30 PM and weekends; otherwise two-zone C$3.95)
    • Operated by: TransLink (same fare/transfer system as bus and SkyTrain)
    Sb Fares
    Photo by Liliana Drew via Pexels. SeaBus fares — C$2.70 weekend/evenings; C$3.95 weekday before 6:30 PM.

    SeaBus Fares

    The SeaBus crossing technically passes between Zone 1 (Vancouver) and Zone 2 (North Vancouver) — but TransLink’s off-peak rule collapses everything to one zone for most of the day’s casual rides.

    Fare table (2026, before July 1 hike):

    • Weekday before 6:30 PM: Two-zone fare C$3.95 (stored value) / C$4.85 (cash)
    • Weekday after 6:30 PM: One-zone fare C$2.70 / C$3.35
    • All weekend and holidays: One-zone fare C$2.70 / C$3.35
    • July 1, 2026 hike: Add ~5% to all rates

    How to pay:

    • Tap Compass Card or contactless credit/debit at the gate
    • Buy single-trip ticket at vending machines
    • Tap-out at destination (mandatory for SeaBus, like SkyTrain)
    • Children under 5 ride free with paying adult

    Transfer included: Your fare covers connecting bus and SkyTrain travel within 90 minutes. SeaBus + bus + SeaBus return is one fare.

    Sb Schedule
    Photo by Fabian Reck via Pexels. SeaBus runs 6 AM-1 AM Monday-Saturday; reduced Sundays/holidays.

    Schedule & Frequency

    The SeaBus runs roughly 7 days a week with reduced Sunday/holiday hours.

    Monday-Saturday from Waterfront:

    • First sailing: 6:16 AM (6:02 AM from Lonsdale Quay)
    • Peak frequency 7-9 AM and 4-7 PM: every 10 minutes
    • Off-peak: every 15 minutes
    • Evening (after 9 PM): every 30 minutes
    • Last sailing from Waterfront: 1:22 AM
    • Last sailing from Lonsdale Quay: 1:00 AM

    Sunday/holidays:

    • First sailing: 8:16 AM (8:02 AM from Lonsdale Quay)
    • Frequency: every 15-30 minutes throughout the day
    • Last sailing: ~11:30 PM

    Real-time tracking: Google Maps and the Transit app both show next-departure times. The SeaBus runs reliably; cancellations are rare except in extreme weather (high winds, ice).

    Sb Route
    Photo by Rodrigo Menezes via Pexels. SeaBus crosses Burrard Inlet — 3.7 km between Waterfront and Lonsdale Quay.

    The Route & Crossing Experience

    The SeaBus traces a 3.7 km diagonal route across Burrard Inlet, the deep harbor that separates downtown Vancouver from the North Shore mountains.

    What you’ll see during the crossing:

    • Departing Waterfront: Canada Place’s iconic white sails to your left, downtown skyscrapers behind
    • Mid-crossing: Container ships, cruise ships (May-Sep), grain terminals, Stanley Park to the left
    • Approaching Lonsdale: Lonsdale Quay’s market hall, the Burrard Dry Dock heritage cranes, Lions Gate Bridge to the left
    • Always: The North Shore mountains (Cypress, Grouse, Seymour, with Crown Mountain prominent) rising directly behind Lonsdale

    Inside the boat: Comfortable ergonomic seats, large windows, indoor heating/cooling, washrooms, bicycle racks at the front. Outdoor deck is closed to passengers (safety reasons).

    Best seats: The front (bow) for forward views; the seats facing inward have less view but are quieter. Back of the boat (stern) for downtown skyline views during return trip.

    Sb Waterfront
    Photo by WeStarMoney Rec via Pexels. Boarding at Waterfront Station — Vancouver’s grand transit hub.

    Boarding at Waterfront Station

    Waterfront Station is the SeaBus’s southern terminus and Vancouver’s grand transit hub.

    Getting there:

    • Canada Line SkyTrain → Waterfront (final stop)
    • Expo Line SkyTrain → Waterfront
    • Walking from Canada Place: 5 minutes
    • Walking from Gastown: 3-5 minutes
    • Walking from Coal Harbour: 5-10 minutes

    Inside Waterfront Station: Follow signs to “SeaBus” — about 200m walk through the heritage station building. Compass Card vending machines are everywhere.

    Boarding: Tap your Compass at the gate. Wait in the boarding lounge (scheduled departure displayed). When the boat arrives, doors open for boarding (about 90 seconds).

    Sb Lonsdale
    Photo by Maximilian Ruther via Pexels. Boarding at Lonsdale Quay in North Vancouver.

    Boarding at Lonsdale Quay

    The Lonsdale Quay terminal is at the south end of Lonsdale Avenue in North Vancouver.

    Getting there:

    • Buses 240, 246, 247, R2 RapidBus all terminate at Lonsdale Quay
    • Drive: 30-45 minutes from downtown via Lions Gate Bridge or Second Narrows
    • Parking: Limited paid parking nearby (C$3-4/hour); bigger lots within 10-minute walk

    The terminal: Modern facility with the Lonsdale Quay Public Market directly attached. Buy/load Compass Card, grab coffee or food before boarding.

    Boarding: Same as Waterfront — tap Compass, wait in lounge, board when announced.

    Sb Things To Do
    Photo by Aaron Lee via Pexels. Lonsdale Quay Public Market — food vendors, gifts, and waterfront views.

    Things to Do at Lonsdale Quay

    Lonsdale Quay is more than a transit terminal. The market hall makes it a worthwhile destination on its own.

    Lonsdale Quay Public Market: Two-story market with food vendors, fresh produce, prepared foods, gift shops. Smaller and less crowded than Granville Island but with similar variety. Open 9 AM-7 PM most days.

    Local dining standouts: Tap & Barrel Lonsdale (waterfront beer + Pacific Northwest), The Lift Bar & Grill (rooftop dining), Burgoo Bistro (comfort food), Famoso Neapolitan Pizza, Olive & Anchor (charcuterie + wine).

    Nearby attractions:

    • Shipyards District (5-min walk): Heritage industrial-converted-to-marketplace area with breweries, restaurants, ice rink in winter
    • Polygon Gallery: Free contemporary photography gallery on the waterfront
    • Burrard Dry Dock heritage site
    • Lonsdale Avenue boutiques and restaurants (10-15 min walk uphill)

    Worth combining: Many visitors do “SeaBus + Lonsdale Quay lunch” as a stand-alone activity — 2-3 hours total, scenic, low effort, low cost.

    Sb Onward
    Photo by Jeffry Surianto via Pexels. From Lonsdale Quay — bus connections to Capilano, Grouse, Lynn Canyon.

    Onward to Capilano, Grouse, Lynn Canyon

    From Lonsdale Quay, transfer to bus for the North Shore’s main attractions.

    Capilano Suspension Bridge: 236 bus to Capilano Suspension Bridge stop, then walk. About 25-30 minutes from Lonsdale Quay. (The free Capilano shuttle from Canada Place is often easier — it’s spring-fall only.)

    Grouse Mountain SkyRide: 236 bus directly to Grouse Mountain SkyRide base. About 25 minutes from Lonsdale Quay. Bus runs ~20 minutes apart.

    Lynn Canyon Park (free Capilano alternative): 240 bus to 15th Street, transfer to 228 East. About 30-40 minutes total. Free admission to bridge and Eco Centre.

    Mount Seymour: 246 bus + 228 transfer. Longer journey best done by car or organized tour.

    Deep Cove (Quarry Rock hike, Honey Doughnuts): 211 bus from Lonsdale Quay. About 30 minutes; popular weekend destination for locals.

    Sb Photography
    Photo by Mert Sırakaya via Pexels. SeaBus photography — sunrise, sunset, and blue hour shots are spectacular.

    Best Photos & Views

    The SeaBus is one of Vancouver’s most photogenic public transit experiences.

    Best photo windows:

    • Sunrise (looking south toward downtown): Pink and gold light on skyscrapers
    • Sunset (looking west): Mountains silhouetted against Howe Sound
    • Blue hour (30 min after sunset): Downtown lights turning on; magic-hour mountain reflection
    • Cruise ship season (May-Sep): Mega-ships at Canada Place create unique scale

    Where to shoot:

    • Front rows on the lower deck for forward-facing shots
    • Side rail position for wide harbor panoramas
    • Rear seats for departure shots of the city you just left
    • Upstairs (wheelhouse area) — limited but offers higher vantage

    Photography tips:

    • Bring a polarizing filter to cut glare on water
    • Wide-angle lens for skyline panoramas (16-35mm equivalent)
    • Mid-tele for compressed mountain shots (70-200mm)
    • Set fast shutter (1/250+) to handle the boat’s gentle motion
    Sb Fleet
    Photo by Nikolai Kolosov via Pexels. SeaBus fleet — Burrard Otter II and Burrard Chinook 400-passenger catamarans.

    The SeaBus Fleet

    TransLink operates two SeaBus catamarans, with a third in the fleet for backup or service growth.

    Burrard Otter II (2009): 400-passenger capacity. Replaced the original 1976 Burrard Otter. Diesel-electric.

    Burrard Chinook (2021): 400-passenger capacity. Newest vessel; battery-hybrid power for reduced emissions.

    Burrard Pacific Breeze (1996): 400-passenger capacity. Currently in reserve; deployed during high demand or maintenance.

    Operating environment: The boats are designed for Burrard Inlet’s conditions — sheltered crossings without open ocean swells. They run reliably in rain, fog, snow, and high winds.

    Sb History
    Photo by Blackcurrant Great via Pexels. SeaBus history — operating since 1977.

    A Brief History

    The SeaBus launched in 1977, replacing private ferries that had connected North Vancouver to downtown since the 1860s. Its launch was a deliberate alternative to building another road bridge across Burrard Inlet — the city chose marine transit over highway expansion.

    Key dates:

    • 1977: Original Burrard Otter and Burrard Beaver enter service
    • 1996: Burrard Pacific Breeze added for capacity
    • 2009: Burrard Otter II replaces original Burrard Otter
    • 2014: Original Burrard Beaver retired
    • 2021: Burrard Chinook enters service as battery-hybrid replacement

    Cultural status: The SeaBus is iconic to Vancouver — it has appeared in countless films, TV shows, and tourism campaigns. Locals consider it part of the city’s identity, and visitors often rate it as a top “free” tourist experience.

    Sb Faqs
    Photo by The Six via Pexels. Common questions about Vancouver SeaBus — cost, frequency, transfers.

    Vancouver SeaBus FAQs

    How long is the SeaBus crossing?
    12 minutes from Waterfront to Lonsdale Quay (and vice versa).

    How much does the SeaBus cost?
    C$2.70-3.95 stored value depending on time of day. Weekends/evenings are one-zone (C$2.70).

    Is the SeaBus included in transit transfers?
    Yes — your fare covers SeaBus + bus + SkyTrain transfers within 90 minutes.

    How often does the SeaBus run?
    Every 10 minutes peak, 15 minutes off-peak, 30 minutes evenings. Hours: 6 AM-1 AM weekdays.

    Can I bring a bike on the SeaBus?
    Yes. Bike racks at the front of each boat hold 4-6 bikes. No reservations needed.

    Are the SeaBus crossings rough?
    No. Burrard Inlet is sheltered; the catamarans are stable. Even on windy days the ride is smooth.

    What’s at Lonsdale Quay besides the ferry?
    A two-story public market with food and shops, restaurants, the Polygon Gallery, the Shipyards District, and connections to North Shore attractions.

    Related reading: Pair this with our SkyTrain guide, Compass Card, and Vancouver buses.

  • Bus Travel in Vancouver: Routes, Apps & Tips (2026 Guide)

    Bus Travel in Vancouver: Routes, Apps & Tips (2026 Guide)

    Hero Buses
    Photo by Brett Sayles via Pexels. Vancouver buses — TransLink runs 235 routes across Metro Vancouver.

    Vancouver buses are the connective tissue of Metro Vancouver’s transit system — TransLink operates 235 bus lines across the region, complementing the SkyTrain and SeaBus to reach virtually every neighborhood, including the ones rail doesn’t serve. For visitors, buses are how you reach Capilano Suspension Bridge, Grouse Mountain, Wreck Beach, Pacific Spirit Park, and Kitsilano Beach. The 99 B-Line is one of North America’s busiest bus routes, ferrying 60,000+ passengers daily between Commercial-Broadway and UBC.

    This guide covers everything visitors need: the routes that matter, how to use the system, fares, apps, the difference between regular buses, B-Line, NightBus, and Community Shuttles, plus tips that locals know — like which apps actually work and how to avoid showing up to a stop that’s just been cancelled.

    Bus Overview
    Photo by Jeffry Surianto via Pexels. TransLink connects all Metro Vancouver neighborhoods via 235 bus lines.

    Vancouver Buses: The Quick Visitor Overview

    TransLink runs 235 bus routes spanning Metro Vancouver from West Vancouver across to Maple Ridge, north up Indian Arm, and south through Richmond and Surrey to White Rock. Buses are operated by Coast Mountain Bus Company on behalf of TransLink. The fleet mixes diesel, hybrid, electric trolley (downtown and East Van), and battery-electric coaches.

    • 235 bus lines across Metro Vancouver
    • Frequency: 5-10 minutes peak on major corridors; 15-30 minutes on lesser routes
    • Hours: ~5 AM to ~1 AM regular service; NightBus 1:30-3:30 AM on key routes
    • One fare covers SkyTrain + bus + SeaBus transfers within 90 minutes
    • Pay: Tap Compass Card, contactless credit/debit card, or buy single-trip ticket at stations
    Bus Types
    Photo by Dávid Lehoczki via Pexels. Vancouver bus types — regular, B-Line, NightBus, Community Shuttle.

    Types of Buses (Regular, B-Line, NightBus, Shuttle)

    Regular buses: Three-digit route numbers (e.g., 240, 25). Standard 40-foot or 60-foot articulated coaches. Stop at every signed bus stop along the route.

    B-Line: “Bus rapid transit” service — limited stops, articulated coaches, and dedicated lanes/queue jumps where possible. Currently four routes: 99 B-Line (Commercial-Broadway to UBC), R1 King George Boulevard (Surrey), R2 Marine Drive (North Shore), R3 Langley/Surrey, and R4 41st Avenue (UBC to Joyce-Collingwood). Faster than regular buses on the same corridor.

    NightBus: Routes prefixed with “N” (e.g., N9, N20). Operate 1:30-3:30 AM after regular SkyTrain and bus service ends. Limited to major corridors connecting downtown to outlying neighborhoods.

    Community Shuttles: Smaller buses (24-passenger) running on lower-demand routes in residential areas. Typically prefixed “C” (e.g., C12). Useful for reaching specific neighborhoods on the North Shore and in the Tri-Cities.

    HandyDART: Door-to-door accessible service for those unable to use regular transit. Pre-registration required; not for casual tourist use.

    Bus Fares
    Photo by Liliana Drew via Pexels. Bus fares are always one-zone — C$2.70 stored value, C$3.35 cash.

    Fares & How to Pay

    Buses use the same fare system as SkyTrain and SeaBus. The good news: bus rides are always one-zone, regardless of how many zones the bus crosses. Buses bypass the zone system entirely.

    Bus fares (2026):

    • Compass stored value / contactless tap: C$2.70 (rising to C$2.85 July 1, 2026)
    • Cash fare: C$3.35 (rising to C$3.50)
    • DayPass: C$11.95 (rising to C$12.55)
    • Concession (5-13, seniors 65+, persons with disabilities): C$2.20
    • Children under 5: free

    How to pay:

    • Tap Compass Card or contactless credit/debit at the front-door reader as you board
    • Cash fare goes in the fare box (exact change; drivers don’t make change)
    • Tap-out is NOT required on buses (unlike SkyTrain/SeaBus)
    • If transferring to SkyTrain, your tap-in on the bus already started the 90-minute window

    Fare evasion: Inspectors do random checks. Failing to tap or pay results in a C$173 ticket. Don’t risk it.

    Bus Tourist Routes
    Photo by Guillermo Quiñones via Pexels. Top tourist bus routes include 99 B-Line, 240 to North Shore, and 250 to Horseshoe Bay.

    The Bus Routes Tourists Use Most

    The 10 routes most likely to matter to visitors:

    99 B-Line (Commercial-Broadway ↔ UBC): The single busiest route. Take it for Museum of Anthropology, Beaty Biodiversity, UBC Botanical Garden, Kits Beach (10-min walk from connecting buses). Every 3-5 minutes peak.

    5 Robson: Downtown spine running east-west along Robson Street. Useful for moving across downtown without SkyTrain.

    22 Knight (Downtown ↔ Knight Street): Connects Granville Street to Mount Pleasant, Knight Street, and the Sunset neighborhood.

    240 (15th Street, North Vancouver): SeaBus to Lonsdale Quay → 240 → North Shore destinations including Lynn Canyon (transfer to 228), Capilano Suspension Bridge area.

    236 (Lonsdale Quay ↔ Grouse Mountain): Direct to Grouse Mountain SkyRide base. Take this after SeaBus across Burrard Inlet for the classic North Shore ski/sightseeing trip.

    250 (Downtown ↔ Horseshoe Bay): Connects downtown to Horseshoe Bay ferry terminal — useful for Bowen Island day trips.

    2 Macdonald: Downtown to Kitsilano via Burrard Bridge. The bus to take to Kits Beach, Vancouver Maritime Museum, HR MacMillan Space Centre.

    4/4UBC: Downtown to UBC via 4th Avenue (parallels 99 B-Line at lower frequency).

    14 Hastings/UBC: Connects East Vancouver, downtown, and UBC via Hastings Street.

    20 Victoria: Downtown to Commercial Drive — useful for evening East Van dining trips.

    Bus 99 Bline
    Photo by Hannibal Photography via Pexels. The 99 B-Line is one of North America’s busiest bus routes.

    The 99 B-Line: Most Important Route for Visitors

    The 99 B-Line deserves its own section because it’s both the busiest single route in Canada and the most useful tourist route in Vancouver.

    Route: Commercial-Broadway SkyTrain station → Broadway corridor → 10th Avenue → UBC bus loop. About 12 km of dedicated transit corridor.

    Stops: Limited (about 18 stops vs. 60+ for the local 9 bus on the same corridor). Major stops include Commercial-Broadway, Main-Broadway, Broadway-City Hall, Granville-Broadway, Macdonald-Broadway, MacDonald-10th, Alma-10th, UBC.

    Frequency: Every 3-5 minutes peak; 5-7 minutes mid-day; 8-10 minutes late evening.

    Travel time: 35-45 minutes Commercial-Broadway to UBC (vs. 60+ for the local 9 bus).

    Why visitors care: Direct access to UBC’s Museum of Anthropology, Beaty Biodiversity Museum, Pacific Spirit Park, and Wreck Beach. Also the gateway to South Granville and Kitsilano corridors.

    Future: The Broadway Subway extension (opening 2027-2028) will replace much of the 99 B-Line’s downtown segment. The B-Line will continue serving the western section to UBC.

    Bus North Shore
    Photo by Travis Kerkvliet via Pexels. North Shore bus connections via Lonsdale Quay link to Capilano, Grouse, Lynn Canyon.

    Reaching North Shore Attractions by Bus

    Vancouver’s North Shore (North and West Vancouver) holds some of the city’s top attractions. Buses are essential for getting around once you cross Burrard Inlet.

    The basic North Shore workflow:

    1. SkyTrain to Waterfront Station
    2. SeaBus across to Lonsdale Quay (12 minutes, included in your fare)
    3. Transfer to bus at Lonsdale Quay

    Routes from Lonsdale Quay:

    • 240 to 15th Street, then transfer to 228 East: Lynn Canyon Park (free Capilano alternative)
    • 236 Grouse Mountain: Direct to Grouse skyride base; ski mountain or grizzly habitat trail
    • 246 to Highland Boulevard: Gateway to Mount Seymour
    • R2 Marine Drive (RapidBus): Connects North Vancouver to West Vancouver including Park Royal
    • 250 Horseshoe Bay (from downtown): Skip SeaBus and take direct bus from downtown to Horseshoe Bay for Bowen Island ferry

    For Capilano Suspension Bridge: Easiest is the FREE Capilano shuttle from Canada Place near Waterfront Station — runs every 30 minutes spring through fall. By transit: 236 from Lonsdale Quay or 246 from downtown via Lions Gate Bridge to the Capilano stop.

    Bus Apps
    Photo by Burst via Pexels. Best apps for Vancouver buses — Google Maps, Transit, Citymapper.

    Best Apps for Vancouver Bus Travel

    The right apps make Vancouver buses dramatically easier to use.

    Google Maps: Surprisingly the best for tourists. Real-time bus tracking, walking-to-stop directions, transfer recommendations, fare estimates. Works offline if you cache the area first.

    Transit (transitapp.com): Local favorite. Real-time arrivals, route maps, alerts on delays/cancellations. Free with optional premium features.

    TransLink Trip Planner: Official planner at translink.ca. Useful for accessibility-specific routing and HandyDART information.

    Citymapper: European/global app that works well in Vancouver. Strong for figuring out which bus stop to use when multiple buses serve similar destinations.

    Compass Mobile: TransLink’s official app. Tap your card, see balance, reload, view trip history. Doesn’t include trip planning.

    Best combination: Google Maps for routing + Transit app for live-tracking the specific bus you’re trying to catch.

    Bus Stops
    Photo by Em Hopper via Pexels. Vancouver bus stops have stop ID codes you can text for live arrivals.

    Reading Stop Signs & Real-Time Info

    Vancouver bus stops have standardized signage with the route numbers served, the schedule, and the stop ID number.

    Stop ID numbers: 5-digit codes (e.g., 50116) found on every stop sign. Text the stop ID to 33333 (“33TXT”) to get a return text with the next 4-5 buses approaching.

    Real-time on apps: Live bus locations are available through Google Maps and Transit. Be aware that small delays (1-3 minutes) are normal.

    Cancellations: Driver shortages occasionally cancel runs. The Transit app shows cancellations clearly; Google Maps sometimes lags 2-3 minutes behind.

    Detours: Construction or events can re-route buses. Stop signs may show temporary detour notices, but apps are more reliable for real-time info.

    Bus Night Bus
    Photo by Niraj Yadav via Pexels. NightBus operates 1:30-3:30 AM after regular SkyTrain hours end.

    NightBus: After SkyTrain Hours

    When the SkyTrain stops running (~1 AM), NightBus picks up.

    Hours: 1:30 AM to 3:30 AM, with frequencies of 30-60 minutes. Service resumes at ~5 AM with regular routes.

    Key NightBus routes from downtown:

    • N9 Coquitlam: Downtown to Coquitlam Centre via Broadway
    • N10 New Westminster: Downtown to New West/Cariboo Loop
    • N17 UBC/Downtown: Downtown to UBC via 4th Avenue
    • N20 Victoria: Downtown to East Van via Commercial Drive
    • N24 Lynn Valley: Downtown to North Vancouver
    • N35 Surrey: Downtown to Surrey via Cambie

    Fares: Same as regular service. Compass Card and contactless tap work normally.

    Limitations: Routes terminate at major hubs, not residential streets. From the hub, you’ll need a 5-15 minute walk to most addresses.

    Bus Accessibility
    Photo by Craig Adderley via Pexels. All Vancouver buses are wheelchair accessible with low-floor ramps.

    Accessibility & Strollers

    Vancouver buses are designed for accessibility.

    Wheelchair access: All conventional buses are low-floor with ramps that deploy at the front door. Buses have two designated wheelchair tie-down spaces.

    Strollers: Welcome on all buses. Designated stroller area near the front. During peak hours, drivers may ask you to fold strollers if the bus is full.

    Service animals: Allowed without restriction. Pets in carriers also permitted.

    Tactile paving: All major stops have tactile pavement strips for visually impaired riders.

    Audio announcements: Buses announce upcoming stops via speaker. The TransLink “Translink Trip Planner” app and 33TXT support visually impaired riders with stop-by-stop trip details.

    Bus Etiquette
    Photo by Justin Hamilton via Pexels. Bus etiquette tips — board front, exit back, thank the driver.

    Etiquette & Tips

    Quick rules to ride like a local.

    • Board at the front, exit at the back on most buses (B-Lines and articulated coaches allow boarding at all doors with valid Compass tap)
    • Pull the cord (yellow strip along windows or red push-buttons) to request a stop — call out 1-2 stops ahead
    • Yield priority seats to seniors, pregnant passengers, persons with disabilities
    • Move to the back when boarding to allow more passengers to enter
    • Skytrain transfers are tighter than rail transfers — leave 5-7 minutes between bus arrivals at SkyTrain stations
    • No food and drink officially; water bottles tolerated
    • Don’t block aisles with luggage; tuck under seats or hold close
    • Thank the driver as you exit — it’s a Vancouver tradition (a wave or “thanks!” works)
    Bus Faqs
    Photo by Ajay Andrew via Pexels. Common questions about Vancouver buses — fares, NightBus, B-Line.

    Vancouver Bus FAQs

    Are Vancouver buses safe?
    Yes. Standard urban precautions apply but Vancouver buses are well-lit, on-camera, and patrolled by transit police.

    How much does a bus ride cost in Vancouver?
    C$2.70 with Compass Card or contactless tap; C$3.35 cash. Buses are always one-zone fare.

    Can I use a bus to get to Capilano Suspension Bridge?
    Yes. Take the free shuttle from Canada Place (spring-fall), or via SeaBus + 236 from Lonsdale Quay year-round.

    Do Vancouver buses run all night?
    NightBus operates 1:30-3:30 AM on key corridors after regular service ends.

    What’s the difference between B-Line and regular bus?
    B-Line buses make limited stops and use dedicated lanes for faster travel on busy corridors.

    Can I bring a bike on Vancouver buses?
    Yes — front-mounted racks hold 2 bikes per bus on most routes.

    Related reading: Pair this with our Compass Card guide, SkyTrain guide, and transportation pillar.

  • Taxi & Rideshare in Vancouver: Uber, Lyft & Local Taxis (2026)

    Taxi & Rideshare in Vancouver: Uber, Lyft & Local Taxis (2026)

    Hero Uber
    Photo by Thought Catalog via Pexels. Uber and Lyft Vancouver — both launched 2020; full citywide coverage in 2026.

    Uber Vancouver launched in 2020 (a relatively late arrival to a Canadian major city) and Lyft followed shortly after. Both now operate citywide alongside the city’s well-established taxi industry. For visitors, rideshare offers app-based booking convenience and transparent pricing. UberX minimum fare is C$6.00; Lyft Standard minimum is C$5.00. A typical 5-km downtown ride runs C$15-22 on either service.

    This guide compares Uber, Lyft, and traditional taxis in Vancouver — pricing, service availability, when each makes the most sense, and the specific quirks (YVR pickup zones, surge pricing patterns, accessible options, tipping etiquette) that matter for visitors.

    Ride Overview
    Photo by Thought Catalog via Pexels. Vancouver rideshare overview — Uber, Lyft, traditional taxis, plus accessibility services.

    Rideshare in Vancouver: Quick Overview

    Vancouver’s rideshare market has three main players plus traditional taxis.

    • Uber: 7 service tiers (UberX, Comfort, Premier, XL, Black, Pet, Assist)
    • Lyft: 2 service tiers (Standard, Plus)
    • Taxis: Yellow Cab, Black Top, MacLure’s, Vancouver Taxi — call dispatch or hail in tourist zones
    • HopSkipDrive: Children-focused service with verified drivers (premium pricing)
    • Kabu: Cantonese-speaking drivers serving the Asian community

    Geographic coverage: All major services cover downtown Vancouver, Burnaby, Richmond, North Vancouver, West Vancouver, Surrey, and most populated areas. Whistler has limited rideshare; taxis dominate.

    Operating hours: Uber and Lyft operate 24/7. Taxis 24/7 (call ahead late nights).

    Ride Uber
    Photo by SHOX ART via Pexels. Uber Vancouver — 7 service tiers; UberX C$0.70/km, C$6 minimum.

    Uber Vancouver

    Uber is the larger player by ride volume in Vancouver and offers more service tiers.

    Service tiers:

    • UberX: Standard 4-passenger sedan. Most common option.
    • Comfort: Newer sedans with extra legroom. Premium ~25% over UberX.
    • Premier: High-end sedans (Audi, BMW, Mercedes). 50-100% premium over UberX.
    • UberXL: 6-passenger SUVs. Useful for groups or extra luggage.
    • Uber Black: Premium black-car service with professional drivers.
    • Uber Pet: Drivers willing to accept pets (small premium).
    • Uber Assist: Drivers trained to help passengers with mobility needs.

    Pricing:

    • Minimum fare: C$6.00
    • Per kilometer: C$0.70
    • Per minute: C$0.30
    • Booking fee: C$2.50
    • Total for typical 5-km, 15-min ride: C$13-18 (no surge)
    • Surge multipliers: 1.0x to 3.5x based on demand

    Payment: Credit card, Apple Pay, Google Pay, debit card, Uber Cash. Cash payment not available in Vancouver.

    Ride Lyft
    Photo by Thought Catalog via Pexels. Lyft Vancouver — Standard and Plus; C$0.65/km, C$5 minimum, slightly cheaper than Uber.

    Lyft Vancouver

    Lyft is the smaller competitor but maintains comparable coverage in major routes.

    Service tiers:

    • Lyft Standard: 4-passenger sedan equivalent of UberX
    • Lyft Plus: 6-passenger vehicle (similar to UberXL)

    Pricing:

    • Minimum fare: C$5.00 (slightly cheaper minimum than Uber)
    • Per kilometer: C$0.65 (slightly cheaper than Uber’s C$0.70)
    • Per minute: C$0.28
    • Booking fee: C$2.50
    • Total for typical 5-km, 15-min ride: C$12-17 (no surge)
    • Surge: Similar pattern to Uber

    Coverage caveats: Lyft sometimes has fewer drivers than Uber, leading to longer wait times in less central areas. Compare both apps before booking — Lyft is often C$1-3 cheaper but may have a 5-10 minute longer ETA.

    Lyft Pink subscription: Premium membership offering discounts on multiple rides — useful only for frequent users (commuters, locals), not most tourists.

    Ride Taxis
    Photo by Tim Samuel via Pexels. Vancouver taxi companies — Yellow Cab, Black Top, MacLure’s, Vancouver Taxi.

    Traditional Taxis in Vancouver

    Vancouver’s taxi industry pre-dates rideshare and remains relevant for specific use cases.

    Major companies:

    • Yellow Cab: 604-681-1111
    • Black Top & Checker: 604-731-1111
    • MacLure’s: 604-321-6611
    • Vancouver Taxi: 604-871-1111

    How to get a taxi:

    • Call dispatch (above numbers)
    • Hail at taxi stands (downtown hotels, Robson Street, Granville Street, Coal Harbour)
    • Use eCab app for app-based taxi booking
    • Some hotels have phones connecting directly to taxi dispatch

    Pricing:

    • Drop fare: C$3.50
    • Per kilometer: C$2.06
    • Per minute waiting: C$0.50
    • YVR zone rates: C$36-45 to most downtown hotels (flat rates)
    • Cruise terminal flat rate: C$38-42

    Payment: All Vancouver taxis accept credit/debit cards. Cash also accepted.

    Why choose a taxi over rideshare:

    • Late-night reliability when rideshare is surging
    • Multiple bags or oversized items (taxis tend to be larger sedans)
    • Wheelchair accessibility (more reliably equipped vehicles)
    • Familiar process for older travelers
    • Pre-set YVR airport flat rates
    • Pre-arranged pickups (taxis can be scheduled days in advance)
    Ride Comparison
    Photo by Mikhail Nilov via Pexels. Cost comparison — Uber, Lyft, taxi for typical Vancouver routes.

    Cost Comparison: Uber vs. Lyft vs. Taxi

    Sample fares for common Vancouver routes (no surge):

    Downtown to Granville Island (5 km, 12 min):

    • UberX: C$13-16
    • Lyft Standard: C$12-15
    • Taxi: C$15-18

    Downtown to Stanley Park entrance (3 km, 8 min):

    • UberX: C$10-13
    • Lyft Standard: C$9-12
    • Taxi: C$12-15

    Downtown to Capilano Suspension Bridge (10 km, 25 min):

    • UberX: C$28-35
    • Lyft Standard: C$26-32
    • Taxi: C$30-38

    YVR to downtown (15 km, 30 min):

    • UberX: C$30-50 (variable surge)
    • Lyft Standard: C$28-45
    • Taxi: C$36-45 (flat rate; no surge)

    Downtown to Whistler (130 km, 2-3 hours):

    • UberX: C$280-400 (rare; usually requires UberXL)
    • Lyft Standard: Often unavailable for this distance
    • Taxi: C$350-450 fixed pricing
    • Better option: Skylynx bus C$50/person or rental car
    Ride Airport
    Photo by Beto Mendes via Pexels. Rideshare from YVR — Level 2 Departures pickup zones; C$30-50 to downtown UberX.

    Rideshare from YVR Airport

    YVR has designated rideshare pickup zones.

    Uber/Lyft pickup location: Level 2 Departures area, Pillars 14-17. Walk up one level from Arrivals using main escalators. Signs guide you.

    Process: Open app, enter destination, select service tier, request ride. Driver name and license plate appear with ETA. Wait at the designated pickup pillar.

    Wait times: Typically 3-10 minutes. Can extend to 15-20 minutes during heavy flight banks (10-11 PM red-eye arrivals).

    Cost expectations: C$30-50 to downtown UberX/Lyft Standard. Surge can push to C$50-90 during peak demand.

    Why taxi might beat rideshare at YVR:

    • Flat-rate zone fare protects against surge
    • Designated taxi rank with shorter wait times
    • Better luggage capacity
    • No app needed
    Ride Cruise
    Photo by Diego F. Parra via Pexels. Rideshare to cruise terminal — Canada Place pickup; surge common debark mornings.

    Rideshare to/from Cruise Terminal

    Vancouver’s main cruise terminal is Canada Place, directly accessible by all transit modes.

    Pickup logistics for departures: Drop-off zone outside Canada Place. Allow 90+ minutes from downtown hotel for boarding day.

    Pickup logistics for arrivals: Designated rideshare pickup zone outside Canada Place. Cruise debark days (typically Saturdays summer mornings) see 3,000+ passengers exit simultaneously — surge pricing common.

    Cost: C$15-25 from most downtown hotels. UberXL or taxi recommended for 4+ bag groups.

    Pre-cruise hotel-to-Canada Place: Most downtown hotels are walking distance (5-15 minutes with luggage carts). Rideshare for further hotels (Yaletown, West End).

    Ride Surge
    Photo by Bastian Riccardi via Pexels. Surge pricing patterns — Friday-Saturday late night, concert endings, weather events.

    Surge Pricing Patterns

    Knowing when surge happens helps you budget or wait it out.

    Predictable surge windows:

    • Friday and Saturday nights 10 PM-2 AM (1.3-2.5x typical)
    • Concert/sports event endings (1.5-3.0x for 30 minutes)
    • Heavy rain or snow events (1.3-2.0x)
    • YVR late-night flight banks (1.3-1.8x)
    • Cruise debark mornings (1.3-2.0x at Canada Place)
    • Major festivals (Pride Parade, Canada Day, fireworks)

    Surge avoidance tactics:

    • Wait 15-20 minutes after surge starts; usually drops
    • Walk 5 minutes to a less-crowded pickup zone
    • Compare Uber and Lyft (surge multipliers may differ)
    • Use taxi if surge exceeds 2x (taxis don’t surge)
    • Use SkyTrain or NightBus instead
    Ride Accessible
    Photo by DΛVΞ GΛRCIΛ via Pexels. Accessible rideshare — Uber Assist trained drivers; wheelchair-accessible taxis.

    Accessible & Wheelchair-Friendly Options

    Mobility-accessible options in Vancouver.

    Uber Assist: Drivers trained to assist with folding wheelchairs and walkers. No price premium. Limited driver availability — can take 10-20 minutes longer to match.

    Wheelchair-accessible taxis: All major Vancouver taxi companies have a fleet of wheelchair-accessible vehicles. Book ahead by phone for guaranteed availability.

    HandyDART: TransLink’s accessible transit service for those unable to use regular transit. Pre-registration required; not for tourists.

    Recommendation: Phone-dispatched accessible taxi is the most reliable option for visitors with mobility needs. Book 30+ minutes ahead.

    Ride Safety
    Photo by Mike Bird via Pexels. Rideshare safety — verify license plate and driver, share trip, sit in back, seatbelts.

    Safety & Etiquette

    Both rideshare and taxis are safe in Vancouver, but follow standard precautions.

    Verify the ride: Match license plate, vehicle make/model, and driver name in the app before getting in. Ask the driver to confirm your name (don’t volunteer it).

    Backseat etiquette: Sit in the back unless asked to sit up front. Wear seatbelts (legally required).

    Conversation: Vancouver rideshare drivers are typically friendly but not pushy. It’s fine to be quiet.

    Sharing your trip: Both Uber and Lyft allow live trip sharing with contacts — a good safety feature for solo travelers.

    Reporting issues: Both apps have post-ride rating and reporting tools. Issues are handled responsively. For taxis, dispatch numbers handle complaints.

    Ride Tipping
    Photo by cottonbro studio via Pexels. Vancouver rideshare tipping — 10-15% via app; 10-15% taxi tip on credit card.

    Tipping

    Tipping is customary in Vancouver rideshare and taxis.

    Uber/Lyft: Add 10-15% via the app post-ride. Apps prompt for tip selection.

    Taxis: 10-15% standard. Driver expects it on credit card; round up cash payments.

    Larger tips: Heavy luggage assistance, waiting time, late-night service, or drivers helping with directions can warrant 15-20%.

    No tips for: Bad service, unsafe driving, refusing requested route. Both apps handle complaints; dispatch handles taxi complaints.

    Ride When Each
    Photo by Rachel Claire via Pexels. When to use Uber, Lyft, or taxi — service comparison and decision matrix.

    When to Use Each Service

    Quick decision matrix for choosing among rideshare and taxis.

    Use Uber/Lyft when:

    • You want app-based booking and transparent pricing
    • You’re traveling 1-2 people with light luggage
    • You’re outside surge windows
    • You want service tier options (XL, Comfort, Black)

    Use a taxi when:

    • You’re at YVR (flat-rate vs. surge)
    • It’s a heavy-surge time (Friday night, cruise day morning)
    • You have multiple bags or oversized items
    • You need wheelchair accessibility
    • You want to schedule a pickup days in advance
    • You don’t want to use an app or have phone issues

    Use SkyTrain/SeaBus/Bus when:

    • You’re going downtown to/from YVR or major SkyTrain station
    • The ride would be C$15+
    • Surge is heavy
    • You’re a budget traveler

    Walk when: The destination is under 1.5 km and weather permits. Vancouver is one of North America’s most walkable cities.

    Ride Faqs
    Photo by Rachel Claire via Pexels. Common questions about Vancouver rideshare — Uber availability, YVR cost, surge.

    Vancouver Rideshare FAQs

    Is Uber available in Vancouver?
    Yes — Uber launched in Vancouver in 2020 and now has 7 service tiers operating citywide.

    How much is Uber from YVR to downtown?
    C$30-50 typical for UberX. Surge can push higher; off-peak around C$30.

    Is Lyft cheaper than Uber in Vancouver?
    Slightly. Lyft Standard’s per-km rate is C$0.65 vs. Uber’s C$0.70. Difference is C$1-3 per typical ride.

    Can I get an Uber to Whistler?
    Technically yes (UberXL), but expect C$280-400 one-way. Skylynx bus (C$50-80) or rental car are better options.

    Do Vancouver taxis accept credit cards?
    Yes — all major Vancouver taxi companies accept credit and debit cards.

    Is rideshare safe in Vancouver?
    Yes — Vancouver has standard rideshare safety with verified drivers, license plate matching, and live trip sharing options.

    What’s the cheapest way to get around Vancouver?
    SkyTrain + SeaBus + bus (Compass Card) is universally cheapest. Use rideshare/taxi as gap-fillers for late nights or off-route trips.

    Related reading: Pair this with our YVR to downtown options, SkyTrain guide, and Driving in Vancouver guide.

  • Driving in Vancouver: Rental Cars, Parking & Tips for 2026

    Driving in Vancouver: Rental Cars, Parking & Tips for 2026

    Hero Driving
    Photo by Line Knipst via Pexels. Driving in Vancouver — densely walkable downtown; rental car shines for day trips.

    Driving in Vancouver as a tourist requires different thinking than driving in most other major cities. Downtown is dense, narrow, and one-way-heavy. Bike infrastructure runs through every major corridor. Parking is expensive (C$25-65/day at most downtown garages) and elusive (free street parking is rare and time-limited). Many of the city’s iconic experiences — Stanley Park Seawall, Granville Island, Gastown — are designed around walking and cycling, not driving.

    That said, a rental car shines for day trips: Whistler, Vancouver Island, Squamish, the Sunshine Coast, and the Fraser Valley wine region. The trick is timing — rent for the days you’re road-tripping, skip the rental for downtown days. This guide tells you when to drive, when not to, and how to handle the realities of car ownership during a Vancouver visit.

    Dr Do You Need
    Photo by Muhammad-Taha Ibrahim via Pexels. Do you need a car in Vancouver? Most first-time visitors don’t — rent only for day trips.

    Do You Actually Need a Car in Vancouver?

    Most first-time visitors don’t. Vancouver’s transit system covers the high-traffic tourist corridors well, walking is rewarding, and rideshare fills gaps cheaply.

    Skip the rental if:

    • Your itinerary is mostly downtown, Stanley Park, Granville Island, Gastown, and Yaletown
    • You’re planning the typical 3-4 day city break
    • You’re traveling with 1-2 people and a few small bags
    • You’d rather not deal with parking

    Rent a car if:

    • You’re doing day trips to Whistler (90 km), Squamish (60 km), or Sea to Sky Gondola
    • Vancouver Island ferry day trip (rental ferries fine)
    • Multi-stop wine country (Okanagan or Fraser Valley)
    • Family of 4+ with multiple bags
    • Photographer with gear and accessories
    • Skiing day trips with gear (rentals at the mountain often save the bag-handling hassle)

    Hybrid strategy: Use transit + rideshare for downtown days. Rent for 1-3 days when day-tripping. Net cost often C$60-150 less than a 5-day rental + downtown parking.

    Dr Rentals
    Photo by Negative Space via Pexels. Rental car options — YVR Airport vs. downtown; pricing C$40-150/day.

    Where to Rent: YVR vs. Downtown

    Two main options for rental pickup, with meaningful pricing and convenience differences.

    YVR Airport rentals:

    • All major brands present (Avis, Budget, Enterprise, Hertz, National, Alamo, Thrifty, Dollar)
    • Rental car center on Level 1 of the parking structure, accessible from terminals
    • Pricing: C$40-80/day economy, C$80-150/day midsize SUV
    • YVR concession fees ~C$5-15/day added
    • Best for: Day-1 pickup, multi-day itineraries that include day trips

    Downtown rentals:

    • Major brands at multiple downtown locations (Avis Burrard, Hertz Burrard, Enterprise multiple)
    • Pricing: typically C$10-25/day cheaper than YVR (no concession fees)
    • Best for: Mid-stay rental for specific day trips

    Picking up downtown after arriving by train: Take Canada Line from YVR to Waterfront, walk or rideshare 5-10 minutes to your downtown rental location.

    One-way rentals: Possible but with surcharges (C$50-200) for ending at a different location.

    Rental tips: Reserve early for summer; check Costco Travel and credit card travel portals for discounts; verify insurance options before declining rental insurance (many credit cards include CDW).

    Dr Rules
    Photo by Efrem Efre via Pexels. BC driving rules — right turns on red, pedestrian right-of-way, hands-free phones only.

    BC Driving Rules & Differences

    BC has some unique driving laws worth knowing.

    Right turn on red: Permitted at most intersections after full stop, unless signed otherwise. Watch for “No Right Turn on Red” signs in downtown.

    Pedestrian right-of-way: BC drivers must yield to pedestrians at all crosswalks (marked or unmarked) at intersections. Strictly enforced.

    Cyclist right-of-way: Bikes have right-of-way in painted bike lanes. Drivers must check blind spots before turning across bike lanes.

    Speed limits:

    • School zones: 30 km/h (8 AM-5 PM school days)
    • Residential streets: 50 km/h (typical default)
    • Major arterials: 60 km/h
    • Highway 1 / Sea-to-Sky / Trans-Canada: 90-110 km/h

    Phone use: Hands-free only. Substantial fines (C$368+) and license demerits for handheld phone use.

    Alcohol: 0.05% blood alcohol triggers immediate driving prohibition; 0.08% is criminal. Vancouver has reliable rideshare and taxi options — don’t drink and drive.

    Seat belts: Required for all occupants. Children under 9 require approved car seats or boosters.

    Headlights: Daytime running lights required (most modern cars do this automatically).

    Dr Downtown
    Photo by Yuri Yuhara via Pexels. Downtown Vancouver driving — one-way streets, traffic patterns, rush hour timing.

    Driving in Downtown Vancouver

    Downtown driving is doable but not pleasant. The street grid is dense; many streets are one-way; traffic lights are frequent.

    One-way streets to memorize:

    • Granville Street: One-way southbound from Robson
    • Howe Street: One-way northbound
    • Hornby Street: One-way southbound
    • Burrard Street: Two-way
    • Pender Street: One-way eastbound (most blocks)
    • Hastings Street: One-way westbound (most blocks)

    Traffic patterns:

    • Rush hours: 7-9:30 AM and 3:30-6:30 PM weekdays
    • Cruise day mornings (May-September): Heavy traffic at Canada Place 7-10 AM
    • Hockey/concert nights: 30-60 minute delays around Rogers Arena/BC Place
    • Lions Gate Bridge: Bottleneck both directions during commute hours and Stanley Park summer weekends

    Tips: Stay in your lane and signal early; lane changes are difficult once you’re in the wrong lane. Watch for buses and cyclists. Drive slowly — pedestrian volume is high.

    Dr Parking
    Photo by Robert So via Pexels. Parking in Vancouver — hotels C$35-65/day; meters C$2-6/hour with 2-hour maximums.

    Parking: Rules, Rates & Where to Find It

    Parking is the single biggest pain point of driving in Vancouver.

    Hotel parking: C$35-65/day at most downtown hotels. Some boutique properties charge C$45-75. Self-parking cheaper than valet.

    Public garages:

    • EasyPark Lot 1 (Hornby/Robson): C$30-40/day
    • Pacific Centre underground: C$30-40/day with shopping validation discount
    • Vancouver Convention Centre: C$30-45/day
    • Library Square: C$25-35/day

    Metered street parking:

    • In effect 9 AM-10 PM daily, including holidays
    • Rates: C$2-6/hour depending on zone
    • Time limits: Typically 2 hours maximum at meters
    • Pay via PayByPhone app, ParkMobile, or coin/credit at meter

    Free residential parking: Some neighborhoods (West End, Mount Pleasant, Kitsilano) have residential permit zones — visitor parking limited to 2-3 hours during business hours.

    Parking finder apps: SpotHero, ParkWhiz, and the City of Vancouver’s “Vancouver Parking” app help locate spots and prices.

    Costly mistakes to avoid:

    • Parking in residential permit zones longer than allowed (C$60+ tickets)
    • Forgetting to feed the meter (C$60-100 tickets)
    • Parking in fire zones (C$100+ tickets)
    • Parking in private lots without paying ($150+ tow fees)
    Dr Bike Lanes
    Photo by SHOX ART via Pexels. Sharing roads with cyclists — separated bike lanes; check blind spots at turns.

    Sharing the Road with Cyclists

    Vancouver has invested heavily in cycling infrastructure. Major corridors have separated bike lanes (Burrard Bridge, Hornby, Dunsmuir, 10th Avenue, Adanac).

    Driver responsibilities:

    • Check blind spots before turning across bike lanes
    • Yield to cyclists in painted lanes during turns
    • Maintain 1.5m passing distance
    • Don’t block bike lanes when stopping or parking
    • Watch for cyclists at intersections — they have right-of-way

    Common conflict zones:

    • Burrard Bridge bike lane (heavy cyclist volume)
    • Dunsmuir Street (downtown commuter route)
    • Hornby Street (downtown protected lane)
    • Stanley Park Seawall (cyclists and walkers — be patient)

    Penalties: Hitting a cyclist or pedestrian carries serious legal and insurance consequences. Drive defensively.

    Dr Bridges
    Photo by Travis Kerkvliet via Pexels. Vancouver bridges — Lions Gate, Burrard, Granville, Cambie, Second Narrows; all toll-free.

    Bridges & Tolls

    Vancouver’s bridges connect downtown to surrounding regions. None are tolled in 2026.

    Lions Gate Bridge: Iconic 1938 suspension bridge connecting downtown to North Shore via Stanley Park. Three lanes, with the center lane changing direction by time of day. Slow at rush hour.

    Burrard Bridge: Connects downtown to Kitsilano. Heritage bridge with separated bike lanes.

    Granville Bridge: Connects downtown to Granville Island and the south side. Six lanes; usually fastest downtown bridge.

    Cambie Bridge: Connects downtown to Mount Pleasant and Yaletown. Less iconic but smooth flow.

    Second Narrows Bridge (Iron Workers Memorial): Connects Burnaby to North Vancouver. Major commuter route — congested rush hours.

    Port Mann Bridge: Highway 1 across the Fraser River. No tolls since 2017.

    Alex Fraser Bridge: Connects Delta and New Westminster. Free.

    Dr Day Trips
    Photo by Adi K via Pexels. Best Vancouver day trips by car — Whistler, Squamish, Vancouver Island, Sunshine Coast.

    Best Day Trips by Car

    Where renting a car pays off.

    Whistler (90 km, 1.5-2.5 hours): Sea-to-Sky Highway is one of North America’s most scenic drives. Whistler Village offers shopping, dining, and skiing/biking depending on season. Stop at Shannon Falls and Sea to Sky Gondola en route.

    Squamish (60 km, 60-75 minutes): Halfway to Whistler. Sea to Sky Gondola, Stawamus Chief hike, kiteboarding, brewery scene.

    Vancouver Island (ferry + drive): 1.5-hour BC Ferries crossing from Tsawwassen + drive options to Victoria, Tofino (5+ hours), or Cowichan wine region.

    Sunshine Coast (ferry from Horseshoe Bay): 40-minute ferry + drive. Sechelt, Gibsons, Roberts Creek for slower-paced coastal vibes.

    Fraser Valley wine country: 1-hour drive to Langley/Abbotsford wineries. Combine with the Cabin Cookhouse or Tap & Barrel locations.

    Bowen Island: 20-minute ferry from Horseshoe Bay. Compact island; bistros, hiking, and Bowen Island Pub.

    Vancouver Aquarium-skipping route via Stanley Park: Drive the seawall route around Stanley Park (one-way, 9 km) for views without parking hassle. Don’t try to park in Stanley Park summer weekends — go on weekday mornings.

    Dr Mountain Driving
    Photo by Gaspar Zaldo via Pexels. Sea-to-Sky Highway driving — 121 km Vancouver to Whistler, sharp curves, fuel up early.

    Sea-to-Sky & Mountain Driving

    The Sea-to-Sky Highway (BC-99) connects Vancouver to Whistler with stunning ocean and mountain views. The drive is more challenging than most North American highways.

    Sea-to-Sky basics:

    • Distance: 121 km Vancouver to Whistler
    • Time: 90-150 minutes one way (longer in summer Friday/Sunday traffic)
    • Lanes: Mostly 2 lanes each direction; some single-lane stretches
    • Speed limits: Mostly 80-90 km/h; reduced to 60-70 in some sections
    • No fuel between Squamish (60 km mark) and Whistler — fuel up before

    Driving cautions:

    • Sharp curves on the Howe Sound corridor
    • Limited passing zones; expect to follow trucks for stretches
    • Wildlife (deer, bear) on highway during dawn/dusk
    • Avalanche-zone warnings posted
    • Winter conditions can require chains or all-season tires (legally required snow tires Oct 1-Apr 30)

    Worth-the-stop pull-offs: Porteau Cove, Murrin Park, Britannia Beach, Shannon Falls, Brandywine Falls.

    Cypress Mountain access: Windy Cypress Bowl Road; switchbacks; can be slow in winter.

    Grouse Mountain access: Steep Nancy Greene Way; tight switchbacks; takes 25-35 minutes from downtown.

    Dr Winter
    Photo by Yunus Tuğ via Pexels. Winter driving — Mountain Highway tires required Oct 1-Apr 30; chains for heavy snow.

    Winter Driving in Greater Vancouver

    Vancouver’s sea-level winter driving is mild but mountain access requires real preparation.

    Sea-level winter: Mostly rain. Snow accumulates a few days each year, often briefly. Most drivers continue without snow tires.

    Mountain winter requirements:

    • Mountain Highways Use Tires must be in place Oct 1-Apr 30 on Sea-to-Sky and access roads
    • 3-peak mountain snowflake or M+S marked tires acceptable
    • Chains required during heavy snow events
    • Cypress, Grouse, Seymour all require Mountain Highway tires for last 5+ km

    What to keep in the car (winter):

    • Ice scraper
    • Warm blanket and gloves
    • Phone charger
    • Snow shovel (for mountain access)
    • Tire chains (rental cars often don’t include these — ask)
    • Headlamp/flashlight

    Cypress, Grouse, Seymour parking lots: Fill by 9-10 AM on busy weekends. Arrive early or take shuttle service from downtown.

    Dr Fuel
    Photo by Ekaterina Belinskaya via Pexels. Vancouver fuel prices — C$1.85-2.05/L regular; Costco cheaper; EV charging widespread.

    Fuel Prices & Charging

    Fuel costs in Vancouver run higher than most of North America.

    Average prices (May 2026):

    • Regular gasoline: ~C$1.85-2.05/L (US$5.20-5.75/gallon equivalent)
    • Premium: ~C$2.05-2.25/L
    • Diesel: ~C$1.95-2.10/L

    Cheaper fuel locations: Costco (members only), Centex stations, Petro-Canada with credit-card discounts. Avoid Stanley Park area Esso and downtown stations — typically the most expensive.

    EV charging: Vancouver has extensive EV infrastructure. Tesla Superchargers at multiple downtown garages; Level 2 chargers at most major attractions; ChargePoint and FLO networks throughout the region. PlugShare app finds available chargers.

    BC Ferries with EVs: Multiple ferry routes accommodate EVs; charging available at terminals.

    Dr Insurance
    Photo by Vlad Deep via Pexels. Driving insurance and documentation — license valid 6 months; credit card CDW available.

    Insurance & Documentation

    Driving requirements for visitors.

    License: Most countries’ valid driver’s licenses work in BC for up to 6 months. International Driving Permit recommended (not strictly required) for non-English licenses.

    Insurance:

    • Rental car insurance: Optional add-on (C$15-30/day)
    • Credit card CDW: Many premium credit cards (Amex Platinum, Chase Sapphire Reserve, etc.) cover collision damage. Verify before declining rental insurance.
    • Personal auto insurance: May not extend to BC for international travelers — confirm with provider
    • Liability insurance: Generally included in rental rates

    Documentation in the car: Rental contract, driver’s license, valid passport/ID. Check rental car for emergency reflective triangles and basic tools.

    Dr Emergencies
    Photo by Jonathan Reynaga via Pexels. Driving emergencies and roadside — 911 emergency, CAA reciprocity, accident steps.

    Emergencies & Roadside Assistance

    Emergency: 911 for police, fire, ambulance.

    Non-emergency police: 604-717-3321 for the Vancouver Police Department.

    BC Ambulance: 911 (charges C$80+ for non-residents; cover with travel insurance).

    Roadside assistance: Most rental contracts include 24-hour roadside service. CAA membership (Canadian counterpart to AAA) reciprocates with most international auto clubs.

    Common roadside issues: Dead battery (mountain cold), flat tires (mountain or rural), running out of fuel (especially on Sea-to-Sky), animal strikes (deer, especially on Vancouver Island).

    If you’re in an accident:

    1. Pull off the road safely; activate hazards
    2. Call 911 if injuries; non-emergency police if property damage only
    3. Exchange information with other drivers
    4. Take photos of damage and scene
    5. Contact rental company immediately
    6. File ICBC claim if needed (BC’s auto insurance corp)
    Dr Faqs
    Photo by Negative Space via Pexels. Common questions about driving in Vancouver — rental need, parking cost, bridges, snow tires.

    Driving in Vancouver FAQs

    Do I need to rent a car in Vancouver?
    For most first-time visitors doing 3-4 days in the city, no. Transit and rideshare cover everything. Rent only for day trips.

    How much is parking in downtown Vancouver?
    C$25-65/day at hotels and public garages. Metered street parking C$2-6/hour with 2-hour maximums in effect 9 AM-10 PM daily.

    Can I drive into Stanley Park?
    Yes — there’s a one-way scenic loop around the park (9 km). Parking lots fill quickly summer weekends. Better to bike, walk, or take the free shuttle.

    What’s the best route to Whistler?
    Highway 99 (Sea-to-Sky) — the only direct route. 90-150 minutes depending on traffic. Stops worth making: Porteau Cove, Britannia Beach, Shannon Falls, Squamish.

    Are bridges into Vancouver tolled?
    No. All bridges in the region are toll-free as of 2026.

    Do I need snow tires for Whistler day trips?
    Legally required Oct 1-Apr 30 on Sea-to-Sky. Rental cars typically include compliant tires; confirm at pickup.

    What’s the deal with driving on the right or left?
    Canada drives on the right (same as US). Steering wheel on the left side of the vehicle.

    Related reading: Pair this with our Vancouver transportation guide pillar, Day trips from Vancouver, and SkyTrain visitor guide.

  • TransLink Fares & Compass Card Explained (2026 Visitor’s Guide)

    TransLink Fares & Compass Card Explained (2026 Visitor’s Guide)

    Hero Compass
    Photo by Kampus Production via Pexels. Compass Card — Vancouver’s reloadable transit smart card for SkyTrain, bus, SeaBus.

    The Compass Card is the reloadable smart card that works on every Metro Vancouver transit service — bus, SkyTrain, SeaBus, West Coast Express, even the West Coast Express bike trains. For a C$6 refundable deposit, you save C$0.50-C$1.20 per ride versus paying cash, and you skip fumbling with bills or coins. Most visitors making 4+ trips during their stay save more than the deposit value within 24 hours.

    This guide explains how Compass Cards work in 2026, how zones and fares interact, the difference between stored value and DayPasses, and the practical workflow for tourists — including the small things (how to tap correctly, what happens if you run out of fare mid-trip, refund process) that aren’t obvious.

    Cc Quick Facts
    Photo by MART PRODUCTION via Pexels. Compass Card quick facts — C$6 deposit, refundable; works on all TransLink services.

    Compass Card: Quick Facts

    • Deposit: C$6 (refundable when returning the card)
    • Reload range: Any amount from C$5 to C$300 stored value, or load specific products (DayPass, monthly pass, U-Pass)
    • Where it works: All TransLink services — bus, SkyTrain, SeaBus, West Coast Express
    • Validity: Stored value never expires; DayPass valid one calendar day; monthly pass valid one calendar month
    • Where to buy: SkyTrain station vending machines, online (compasscard.ca), customer service centers (Stadium-Chinatown, Waterfront, Surrey Central)
    • Tap-to-pay alternative: Contactless credit/debit cards work directly at gates with the same stored-value pricing
    Cc Fares 2026
    Photo by Kindel Media via Pexels. 2026 fares — single trip C$2.70-C$5.40 stored value; July 1 hike adds 5% across the board.

    2026 Fares & July 1 Fare Hike

    TransLink raised fares effective July 1, 2026. The increase averages 5%.

    Single-trip fares before July 1, 2026:

    • One-zone (Compass stored value): C$2.70
    • Two-zone (Compass): C$3.95
    • Three-zone (Compass): C$5.40
    • One-zone cash/contactless: C$3.35
    • Two-zone cash/contactless: C$4.85
    • Three-zone cash/contactless: C$6.60

    Single-trip fares effective July 1, 2026:

    • One-zone (Compass stored value): C$2.85
    • Two-zone (Compass): C$4.15
    • Three-zone (Compass): C$5.65
    • One-zone cash/contactless: C$3.50
    • Two-zone cash/contactless: C$5.10
    • Three-zone cash/contactless: C$6.90

    DayPass: C$11.95 → C$12.55

    Monthly pass (one-zone adult): C$111.60 → C$117.20

    YVR AddFare: C$5.00 (unchanged) — applies to trips originating at YVR-Airport Station only.

    Concessions (youth, senior, disability): Discounted to roughly 35-45% of adult fare. Verification required.

    Cc Zones
    Photo by The Six via Pexels. Fare zones — three zones determine fare; off-peak collapses everything to one-zone.

    Fare Zones Explained

    Metro Vancouver is divided into three zones for fare purposes. The zone count is determined by the zones you travel through, not the number of stops.

    Zone 1: City of Vancouver only. Includes downtown, Olympic Village, Mount Pleasant, Commercial Drive, Main Street, parts of east Van and the West End.

    Zone 2: Burnaby (most of), North Vancouver (and SeaBus crossing), West Vancouver, Richmond, parts of New Westminster.

    Zone 3: Surrey, Coquitlam, Maple Ridge, Pitt Meadows, Port Coquitlam, Langley.

    Off-peak rule: Weekdays after 6:30 PM, all weekends, and statutory holidays — every trip is one-zone regardless of distance. This is a major savings opportunity. A Vancouver-to-Surrey trip costs C$2.70 instead of C$5.40.

    YVR exception: The C$5 AddFare applies to all trips starting at YVR-Airport Station, even off-peak. It does NOT apply to return trips ending at YVR.

    Cc Stored Value
    Photo by MART PRODUCTION via Pexels. Stored value vs. single trips — saves C$0.65-C$1.20 per trip vs. cash fares.

    Stored Value vs. Single Trips

    The Compass system uses “stored value” — money loaded onto the card that you tap-out to pay for trips.

    Why stored value is cheaper: Single-trip fares (paid cash at vending machine or via contactless credit card) cost more than stored value because TransLink wants to incentivize fewer transactions and faster gates. Stored value saves C$0.65 (one-zone), C$0.90 (two-zone), or C$1.20 (three-zone) per trip.

    How much to load:

    • 1-day visit: Skip the card; tap-to-pay credit card
    • 2-3 day visit: Load C$15-25 stored value
    • 4-7 day visit: Load C$30-50 stored value
    • 1+ week sightseeing: Consider a 1-Zone monthly pass if doing 30+ rides (break-even ~30 rides)

    Topping up mid-trip: All vending machines, customer service offices, and the Compass Card mobile app allow reloading anytime.

    Cc Daypass
    Photo by Brett Sayles via Pexels. DayPass — C$11.95 unlimited rides one day; break-even at 5 one-zone trips.

    DayPass Option

    The Compass Card can carry a DayPass — unlimited rides for one calendar day from first tap until 4 AM the next day.

    Cost: C$11.95 (rising to C$12.55 July 1, 2026).

    Break-even: 4 one-zone rides on Compass stored value would cost C$10.80 — a DayPass beats stored value at the 5th ride. For two-zone trips, break-even is at the 3rd ride.

    When DayPass makes sense:

    • Multi-attraction sightseeing days (downtown + UBC + Granville Island + North Shore)
    • Tourist itineraries with 4+ planned transit segments
    • Day trips combining SkyTrain + SeaBus + bus

    When stored value beats DayPass: Day plans with only 2-3 trips (stored value is cheaper).

    Cc Monthly
    Photo by Leeloo The First via Pexels. Monthly passes — C$111.60-C$198.10 by zone; tourist relevance limited.

    Monthly Passes

    Long-stay visitors (digital nomads, business assignments, students) may benefit from a monthly pass.

    Adult monthly pass costs:

    • One-zone: C$111.60 → C$117.20 (July 1, 2026)
    • Two-zone: C$149.40 → C$156.85
    • Three-zone: C$198.10 → C$208.00

    Break-even: 30 weekday round-trips (i.e., commute every weekday) makes the monthly pass worthwhile at one-zone. Less worthwhile if your travel pattern is sporadic.

    Tourist relevance: Generally not. Most visitors do better with stored value or DayPass.

    Cc Where Buy
    Photo by Kuan-yu Huang via Pexels. Where to buy a Compass Card — SkyTrain station vending machines, customer service centers.

    Where to Buy a Compass Card

    Compass Cards are widely available. The most convenient locations for visitors:

    SkyTrain station vending machines: All 53 stations. Touchscreen interface in multiple languages. Accepts cash, debit, credit. Most visitors buy theirs at YVR-Airport, Waterfront, or Vancouver City Centre.

    Online (compasscard.ca): Order online for delivery. Useful only if planning ahead — takes 5-10 business days.

    Customer service centers: Stadium-Chinatown, Waterfront, and Surrey Central stations. Live agents available for questions or unusual requests.

    Compass Vending Machines (CVMs): Outside SkyTrain stations and at some bus loops. Same interface as in-station machines.

    Selected London Drugs and 7-Eleven stores: Sells cards and tops them up.

    Cc Loading
    Photo by Luis Quintero via Pexels. How to load your Compass Card — vending machine, online, mobile app, auto-load.

    How to Load Your Card

    Loading stored value or products onto your Compass Card.

    At the vending machine:

    1. Tap your card on the reader
    2. Select “Load Stored Value” or “Load Pass”
    3. Choose amount (C$5-300) or product (DayPass, monthly pass)
    4. Insert payment (cash/debit/credit)
    5. Tap card again to confirm; receipt printed

    Online via compasscard.ca:

    1. Register your card to your account (one-time)
    2. Choose load type (stored value, DayPass, monthly)
    3. Enter amount and payment
    4. Tap your card at any reader within 24 hours to activate the load

    Auto-Load feature: Set up automatic top-ups when balance falls below a threshold. Useful for long-stay visitors but generally unnecessary for short trips.

    Mobile app: The Compass Mobile app lets you check balance, reload, and view trip history. Free download for iOS and Android.

    Cc Using
    Photo by MART PRODUCTION via Pexels. How to use the Compass Card — tap in, travel, tap out at SkyTrain/SeaBus; bus tap-in only.

    How to Use the Card (Step-by-Step)

    For SkyTrain & SeaBus:

    1. Tap In: Touch your Compass Card to the gate reader at the station entrance. The gate opens.
    2. Travel: Take your trains/transfers as needed within 90 minutes of first tap.
    3. Tap Out: Touch your card on the reader at your destination station. This calculates the correct fare and deducts it from your card.

    For buses:

    1. Tap In: Touch your card to the reader near the front door as you board. Pay-as-you-board.
    2. Tap Out: Generally not required for buses, but tap if your trip continues to a SkyTrain or SeaBus.

    What if you forget to tap out? The system charges the maximum possible fare for the trip you started. You can dispute this through customer service if it was a one-time mistake.

    What if your balance is too low? The gate refuses entry. You can top up at the vending machine immediately. On buses, drivers will request you exit at the next stop if you can’t pay.

    What if the card reader doesn’t read? Try a different gate; cards occasionally have read failures. Customer service can replace defective cards (deposit transfers).

    Cc Transfers
    Photo by anung via Pexels. Compass transfers — one fare covers SkyTrain + bus + SeaBus within 90 minutes.

    Transfers & AddFares

    One fare covers all your transit within 90 minutes from first tap.

    Transfer rules:

    • SkyTrain → bus → SeaBus → another SkyTrain — all covered if completed within 90 minutes
    • Each transfer requires another tap (in for SkyTrain/SeaBus; in for buses)
    • Bus-to-bus transfers automatically credit; no extra fare
    • If you ride into a higher zone mid-trip, the system calculates the upgraded fare automatically

    YVR AddFare:

    • C$5.00 surcharge on all trips originating at YVR-Airport Station
    • Doesn’t apply to return trips ending at YVR
    • Doesn’t apply to trips beginning at Bridgeport, Templeton, or Sea Island Centre stations
    • Can’t be avoided by transferring; the surcharge tracks the origin

    West Coast Express: Different fare structure (zoned, premium pricing). The Compass Card works but is metered separately.

    Cc Refunds
    Photo by Rangoni Gianluca via Pexels. Compass Card refunds — return at customer service center for deposit + remaining balance.

    Refunds & Returning the Card

    Done with your card? You can refund the C$6 deposit.

    Refund options:

    • In-person at customer service center: Stadium-Chinatown, Waterfront, or Surrey Central. Cash or debit refund of deposit + remaining balance.
    • By mail: Mail card with completed refund form to TransLink. Cheque mailed in 4-6 weeks.
    • Online: Some online accounts offer e-transfer refunds.

    What’s refundable: The C$6 deposit and any unused stored value. The DayPass and monthly pass are non-refundable once activated.

    Don’t bother: If you’re keeping the card for future trips (return to Vancouver), don’t return it. Stored value never expires.

    Cc Tap Credit
    Photo by Towfiqu barbhuiya via Pexels. Tap-to-pay alternative — contactless credit cards work directly at gates.

    Tap-to-Pay Without a Compass Card

    The faster path for short visits.

    How it works: Tap your contactless credit card (Visa, Mastercard, Amex), Apple Pay, Google Pay, or other contactless wallet directly at the gate. The fare is charged to your card.

    Pricing: Same as Compass stored value (the cheaper rate).

    What works: Contactless credit/debit cards from any country, Apple Pay, Google Pay, Samsung Pay, and other digital wallets.

    What doesn’t work: Magnetic stripe cards (rare in 2026), older non-contactless cards.

    Best for: 1-3 day visits where you don’t want the deposit hassle.

    Not best for: Currency-conversion-fee-paying credit cards (each tap is a separate small foreign transaction). Use a no-FX-fee card if available.

    Cc Tourist Strategy
    Photo by Ketut Subiyanto via Pexels. Tourist strategy — Compass Card if 4+ days; tap credit card if 1-3 days.

    Tourist Strategy: When to Buy a Card

    Buy a Compass Card if:

    • Staying 4+ days with multiple transit-using days
    • You’re not comfortable repeatedly tapping a contactless credit card
    • Your credit card charges foreign transaction fees
    • You want a souvenir that you can keep for future visits

    Skip the Compass Card and tap-to-pay if:

    • Staying 1-3 days
    • Doing only 1-3 transit trips total
    • You have a contactless credit card with no FX fees
    • You don’t want to deal with deposit refund logistics

    Hybrid strategy: Tap your credit card for the airport-arrival trip; buy a Compass at your destination station if continuing to use transit.

    Cc Faqs
    Photo by Ketut Subiyanto via Pexels. Common questions about Compass Card — where to buy, refunds, expiration, kids.

    Compass Card FAQs

    Where do I get a Compass Card in Vancouver?
    Vending machines at every SkyTrain station, including YVR-Airport. Online at compasscard.ca. Customer service centers at Stadium-Chinatown, Waterfront, and Surrey Central.

    How much is a Compass Card?
    C$6 refundable deposit, plus the amount you load (minimum C$5 stored value).

    Can I use my credit card directly?
    Yes — contactless credit/debit cards and digital wallets work at all gates with the same Compass-stored-value pricing.

    What’s the difference between cash fare and Compass fare?
    Compass stored value (or contactless tap) saves C$0.65-C$1.20 per trip vs. cash fare.

    Do children need a Compass Card?
    Children under 5 ride free with a paying adult. Ages 5-13 use Concession (Y) Compass at reduced fares.

    Does my Compass Card expire?
    Cards don’t expire as long as they’re used at least once every 4 years. Stored value never expires.

    Can I buy a Compass Card on the bus?
    No. Buses are tap-only. Buy your card before your first bus trip — at any SkyTrain vending machine or partner retailer.

    Related reading: Pair this with our SkyTrain visitor’s guide, YVR to downtown options, and Vancouver on a budget pillar.

  • Vancouver SkyTrain: The Complete Visitor’s Guide for 2026

    Vancouver SkyTrain: The Complete Visitor’s Guide for 2026

    Hero Skytrain
    Photo by The Six via Pexels. Vancouver SkyTrain — 53 stations across 3 fully automated, driverless lines.

    The Vancouver SkyTrain is one of the world’s largest fully automated, driverless rapid-transit systems — three lines (Expo, Millennium, Canada Line) connecting 53 stations across Metro Vancouver. For visitors, it’s the most efficient way to move between downtown, the airport, Burnaby, Richmond, the North Shore (via SeaBus connection), and major attractions like Granville Island (via short walk from Olympic Village station).

    This is the comprehensive 2026 visitor’s guide: how the system works, fares, the lines explained, the stations that matter for tourists, transfers, accessibility, and the small things that make the difference between a smooth ride and a confused one.

    St Overview
    Photo by Uzay Yildirim via Pexels. SkyTrain at a glance — 500,000 boardings/day; runs ~5 AM to 1 AM.

    SkyTrain at a Glance

    The SkyTrain has run since 1985 (built for Expo 86) and is operated by TransLink, Metro Vancouver’s transit authority. Three lines now serve 53 stations across 79 km of track. It’s fully automated — there are no drivers — yet handles roughly 500,000 boardings per day.

    • 3 lines: Expo Line (oldest), Millennium Line, Canada Line
    • 53 stations across Metro Vancouver
    • Frequency: Every 2-3 minutes peak; 6-8 minutes off-peak; 15-20 minutes late night
    • Hours: ~5 AM to 1 AM weekdays; slightly later on weekends
    • Stored-value fare: C$2.70 (one-zone), C$3.95 (two-zone), C$5.40 (three-zone) — rising to C$2.85, C$4.15, C$5.65 on July 1, 2026
    • Fully accessible: All stations elevator-equipped; level boarding throughout
    St Canada Line
    Photo by Glen Zi 加侖子 via Pexels. The Canada Line — newest line connecting YVR Airport, downtown, and Richmond.

    The Canada Line

    The Canada Line is the youngest of the three lines (opened 2009 for the 2010 Olympics) and the most relevant to visitors. It’s the only line connecting YVR International Airport, downtown Vancouver, and the Richmond suburbs.

    Route: 17 stations from YVR-Airport to Waterfront downtown, with a branch to Richmond-Brighouse.

    Key stops for visitors:

    • YVR-Airport: Vancouver International Airport — the obvious one
    • Bridgeport: Richmond hotels, Casino Resort, IKEA
    • Aberdeen: Richmond Asian shopping (Aberdeen Centre, Yaohan Centre)
    • Lansdowne: Richmond Centre mall
    • Richmond-Brighouse: Steveston (via 401 bus connection)
    • Marine Drive: Lower mainland connector
    • Olympic Village: False Creek south side, Olympic Village neighborhood
    • Yaletown-Roundhouse: Yaletown shops and restaurants
    • Vancouver City Centre: Robson Street, Pacific Centre, central downtown hotels
    • Waterfront: Canada Place, cruise terminals, SeaBus to North Vancouver

    Travel times:

    • YVR to Waterfront: 25 minutes
    • YVR to Vancouver City Centre: 23 minutes
    • YVR to Olympic Village: 21 minutes
    • Bridgeport to Vancouver City Centre: 17 minutes

    Frequency: Every 6-7 minutes most of the day; every 20 minutes during late hours.

    St Expo Line
    Photo by Glen Zi 加侖子 via Pexels. The Expo Line — original 1985 line through East Vancouver, Burnaby, Surrey.

    The Expo Line

    The original SkyTrain line, running between Waterfront downtown, through East Vancouver, Burnaby, New Westminster, and to King George station in Surrey. It split into two branches at Columbia (Production Way-University and King George).

    Key stops for visitors:

    • Waterfront: Downtown’s transit hub; SeaBus and West Coast Express connect here
    • Burrard: Burrard Street area, central downtown
    • Granville: Granville Street nightlife, Robson Square
    • Stadium-Chinatown: BC Place, Rogers Arena, Chinatown, Science World (10-min walk)
    • Main Street-Science World: Science World direct exit, False Creek Seawall, Quebec Street
    • Commercial-Broadway: Major transfer hub; connects to 99 B-Line bus to UBC
    • Metrotown: Metropolis at Metrotown (largest BC mall)
    • New Westminster / Columbia: Pier West, Quay/marketplace
    • King George (Surrey): Surrey Central business district

    Frequency: Every 2-3 minutes peak; 5-6 minutes mid-day; 8-10 minutes late evening.

    St Millennium Line
    Photo by Henry C Wong via Pexels. The Millennium Line — Burnaby, Coquitlam corridor; Broadway extension under construction.

    The Millennium Line

    The Millennium Line runs from VCC-Clark in East Vancouver through Burnaby and Coquitlam to Lafarge Lake-Douglas in Coquitlam. Less tourist-relevant than the other two lines, but useful for some specific trips.

    Key stops for visitors:

    • VCC-Clark: East Vancouver entry
    • Commercial-Broadway: Transfer hub (also Expo Line)
    • Brentwood Town Centre: Burnaby shopping
    • Production Way-University: SFU Burnaby Mountain campus connection
    • Coquitlam Central: Coquitlam Centre mall
    • Lafarge Lake-Douglas: End of line; lake walking path

    Note: The 2025-2027 Broadway Subway extension will extend the Millennium Line west from VCC-Clark through Mt. Pleasant, Cambie, and Granville to Arbutus Street. Set to open phased through 2028.

    St Fares
    Photo by SHOX ART via Pexels. SkyTrain fares — C$2.70 stored value, C$3.35 cash; July 1, 2026 hike to C$2.85/C$3.50.

    Fares & Compass Card

    SkyTrain (and bus, SeaBus) all use the same fare system, managed by TransLink.

    Cash/contactless tap fares (single trip, 90 minutes):

    • One-zone: C$3.35 (rising to C$3.50 July 1, 2026)
    • Two-zone: C$4.85 (rising to C$5.10)
    • Three-zone: C$6.60 (rising to C$6.90)

    Compass Card stored-value fares (cheaper):

    • One-zone: C$2.70 (rising to C$2.85)
    • Two-zone: C$3.95 (rising to C$4.15)
    • Three-zone: C$5.40 (rising to C$5.65)

    DayPass: C$11.95 (rising to C$12.55) — unlimited rides for one calendar day across all lines and zones.

    YVR AddFare: C$5.00 surcharge for trips originating at YVR-Airport Station only. Doesn’t apply when returning to airport.

    Free travel: Children under 5 ride free with a fare-paying adult.

    St Zones
    Photo by Plato Terentev via Pexels. Three SkyTrain zones — Vancouver, inner suburbs, outer suburbs; off-peak all one-zone.

    Fare Zones Explained

    Three zones determine your fare. The zone count is based on which zones you cross, not where you start or end.

    Zone 1 (downtown core): City of Vancouver, including all downtown stations, Olympic Village, Mount Pleasant, Granville, Burrard, Stadium-Chinatown, Main Street-Science World, Commercial-Broadway, plus much of east Vancouver.

    Zone 2: Burnaby, North Vancouver (via SeaBus), West Vancouver, Richmond, parts of New Westminster.

    Zone 3: Surrey, Coquitlam, Maple Ridge, Pitt Meadows, Port Coquitlam.

    Time-of-day rule: Weekdays after 6:30 PM, all weekends, and statutory holidays — all trips are charged the one-zone fare regardless of how far you travel. Saves C$1.25-C$2.70 per trip vs. peak two- or three-zone fares.

    YVR exception: The YVR AddFare adds C$5.00 to any trip starting at YVR-Airport Station, even off-peak.

    St Tourist Stations
    Photo by WeStarMoney Rec via Pexels. Top 10 tourist SkyTrain stations — YVR, Waterfront, City Centre, Yaletown, Olympic Village.

    Stations Tourists Use Most

    The 10 stations that matter most for visitors.

    1. YVR-Airport (Canada Line): Airport entry/exit. Trains every 6-7 minutes, walking distance from any terminal.

    2. Waterfront (Canada Line, Expo Line, SeaBus, West Coast Express): Downtown’s grand central — connects to Canada Place, cruise terminals, North Vancouver via SeaBus, and points east via WCE.

    3. Vancouver City Centre (Canada Line): Robson Street, Pacific Centre, Hudson’s Bay, Hotel Georgia.

    4. Yaletown-Roundhouse (Canada Line): Yaletown restaurants, BC Place, OPUS Vancouver hotel.

    5. Olympic Village (Canada Line): False Creek seawall, Olympic Village neighborhood, ~10-minute walk to Granville Island via Cambie Bridge.

    6. Burrard (Expo Line): Coal Harbour seawall, Sutton Place Hotel, Bentall Centre.

    7. Granville (Expo Line): Granville Street pedestrian zone, theatre district, Vancouver Library Central.

    8. Main Street-Science World (Expo Line): Science World, False Creek waterfront, ferries to Granville Island.

    9. Commercial-Broadway (Expo Line, Millennium Line): Transfer hub for the 99 B-Line bus to UBC and Museum of Anthropology.

    10. Metrotown (Expo Line): Metropolis at Metrotown — biggest mall in BC.

    St Transfers
    Photo by Glen Zi 加侖子 via Pexels. SkyTrain transfers — 90-minute window covers SkyTrain, bus, SeaBus to North Vancouver.

    Transfers & SeaBus Integration

    One fare covers SkyTrain + bus + SeaBus transfers within 90 minutes.

    Major transfer points:

    • Waterfront: Canada Line ↔ Expo Line ↔ SeaBus ↔ West Coast Express
    • Vancouver City Centre ↔ Granville: 5-minute underground walk between Canada Line and Expo Line
    • Commercial-Broadway: Expo Line ↔ Millennium Line ↔ 99 B-Line bus
    • Bridgeport: Canada Line YVR branch ↔ Richmond branch
    • Lonsdale Quay (across SeaBus): SeaBus ↔ buses for Capilano Suspension Bridge, Grouse Mountain, Deep Cove

    SeaBus details: Catamaran ferry that crosses Burrard Inlet from Waterfront Station to Lonsdale Quay (North Vancouver) in 12 minutes. Same fare system; included in transfers. Beautiful harbor views.

    Free shuttles connecting: Capilano Suspension Bridge runs a free shuttle from Canada Place near Waterfront Station — combine with SeaBus to Lonsdale and bus back for a half-day North Shore loop.

    St Accessibility
    Photo by Craig Adderley via Pexels. SkyTrain accessibility — all 53 stations elevator-equipped, level boarding throughout.

    Accessibility & Luggage

    The SkyTrain is one of North America’s most accessible transit systems.

    Wheelchair accessibility: All 53 stations have elevators. All trains are level-boarding (no step or gap). Train interior includes designated wheelchair spaces with priority signage.

    Stroller accessibility: Same as wheelchairs. Strollers fold or stand flat against window areas. No issues during off-peak times.

    Luggage capacity: Standard size suitcases fit comfortably in spaces near doors. The trains accommodate two large suitcases per traveler with room for foot traffic. Avoid weekday rush hours (8-9 AM, 4:30-6 PM) if possible.

    Bicycles: Allowed on most trains all day except weekday rush hours. Two-bike capacity per car typical. Always board the front of the train where the bike storage is.

    Service animals: Allowed on all trains. Pets in carriers also permitted.

    St Hours
    Photo by Maximilian Ruther via Pexels. SkyTrain hours — first trains ~5 AM, last trains ~1 AM weekdays; weekend variation.

    Hours & Frequencies

    Canada Line:

    • First train YVR to Waterfront: 5:08 AM
    • Last train YVR to Waterfront: 12:57 AM
    • First train Waterfront to YVR: 4:49 AM
    • Last train Waterfront to YVR: 1:05 AM
    • Frequency: every 6-7 minutes; every 20 minutes late hours

    Expo Line:

    • First trains: ~5 AM both directions
    • Last trains: ~1:15 AM weekdays; ~1:45 AM Saturdays; ~12:30 AM Sundays
    • Frequency: every 2-3 minutes peak; 6-8 minutes off-peak

    Millennium Line:

    • First trains: ~5 AM both directions
    • Last trains: ~12:45 AM weekdays
    • Frequency: every 3-5 minutes peak; 8-10 minutes off-peak

    Sunday/holiday note: All lines operate slightly later starts and earlier ends. Check translink.ca for exact times before late-night travel.

    St Safety
    Photo by Jimmy Liao via Pexels. SkyTrain safety — 24/7 transit police, emergency intercoms, safety etiquette.

    Safety & Etiquette

    The SkyTrain is statistically very safe but, like any public transit, follow standard urban precautions.

    Safety basics:

    • Stand back from platform edges (yellow tactile strip)
    • Hold the railing on escalators (busy platforms)
    • Be aware of belongings; keep wallet/phone secure during boarding
    • SkyTrain Police patrol regularly; Compass-tap card readers help track concerning behavior
    • Emergency intercom buttons in every car

    Etiquette:

    • Let people exit before boarding
    • Move to the back/middle of cars during rush hour
    • No food or drink (officially); water bottles tolerated
    • Yield priority seats to seniors, pregnant, disabled
    • Keep music in headphones
    • Skateboards and large bags should be tucked, not blocking aisles
    St Money Saving
    Photo by MART PRODUCTION via Pexels. SkyTrain money-saving tips — Compass Card, DayPass, off-peak zone-jumping benefit.

    Money-Saving Tips

    1. Get a Compass Card. Save C$0.50-C$1.20/ride vs. cash. Refundable C$6 deposit.

    2. Buy a DayPass for sightseeing days. 4+ rides in one day breaks even at C$11.95.

    3. Use after-6:30 PM weekdays for free zone-jumping. Travel from downtown to Surrey for a one-zone fare in the evening.

    4. Travel weekends within Zone 1. Same one-zone-fare benefit applies all day weekends and statutory holidays.

    5. Tap with credit card if staying 1-2 days. Skip the Compass Card deposit for short trips.

    6. Avoid YVR-bound trips except when needed. The C$5 AddFare makes YVR trips noticeably pricier; combine YVR visits with airport stops.

    7. Use SeaBus instead of Lions Gate Bridge taxi. SeaBus to Lonsdale + Capilano shuttle is C$2.70 each way vs. C$45-60 taxi.

    St Future
    Photo by Anil Sharma via Pexels. Broadway Subway extension — Millennium Line west to Arbutus, opening 2027-2028.

    Future Expansion: Broadway Subway

    Vancouver’s biggest current transit project is the Broadway Subway — a 5.7 km underground extension of the Millennium Line from VCC-Clark to Arbutus Street, with stations at Mount Pleasant, Great Northern Way, Mount Pleasant, Broadway-City Hall (transfer with Canada Line), Oak-VGH, Granville, and South Granville.

    Status (May 2026): Construction in progress. Phased opening expected 2027-2028.

    Visitor impact when complete: Direct rail access from downtown to Vancouver General Hospital area, South Granville shopping district, Granville Island vicinity (10-min walk), and the future arts/cultural district along Great Northern Way.

    Construction impact 2026: Some Broadway corridor traffic and pedestrian disruptions. Detours signed; bus service maintained throughout.

    St Faqs
    Photo by The Six via Pexels. Common questions about Vancouver SkyTrain — cost, frequency, hours, bikes, WiFi.

    SkyTrain FAQs

    How much does the SkyTrain cost?
    One-zone trip C$2.70 stored value or C$3.35 cash; rises to C$2.85/C$3.50 on July 1, 2026.

    How frequent is the SkyTrain?
    Every 2-3 minutes peak; 5-8 minutes mid-day; 15-20 minutes late hours.

    Is the SkyTrain 24 hours?
    No. Operates roughly 5 AM to 1 AM, with slight variation by line. Late-night NightBus service connects to most areas after SkyTrain hours.

    Where do I buy a Compass Card?
    At any SkyTrain station vending machine, the YVR ticket vending machine, online at compasscard.ca, or at SkyTrain customer service centers (Stadium-Chinatown, Waterfront).

    Can I bring my bike on the SkyTrain?
    Yes, except during weekday rush hours (7:30-9:30 AM and 4-6:30 PM). Two bikes per car.

    Is there free WiFi on SkyTrain?
    Limited at some stations; not consistently in trains. Cell coverage is universal.

    Do I need exact change?
    No. Vending machines accept cash, debit, and credit. Tap-to-pay credit cards work at all gates.

    Related reading: Pair this with our YVR to downtown guide, Compass Card explainer, and Vancouver transportation pillar.

  • YVR to Downtown Vancouver: Your Transport Options in 2026 (SkyTrain, Taxi, Uber)

    YVR to Downtown Vancouver: Your Transport Options in 2026 (SkyTrain, Taxi, Uber)

    Hero Yvr
    Photo by Adrien Olichon via Pexels. YVR to downtown Vancouver — Canada Line SkyTrain in 25 minutes for C$9.

    YVR to downtown Vancouver is one of the easiest airport-to-city transfers in North America. The Canada Line SkyTrain — built for the 2010 Olympics — connects Vancouver International Airport directly to Waterfront Station downtown in 25 minutes for C$9.00 (or C$7.75 weekday evenings and weekends). Ride frequency is every 6-7 minutes during the day, and the entire trip is paved, indoor, and stroller-and-luggage friendly.

    If you don’t want transit, taxis run a flat-rate zone fare to most downtown hotels (C$36-45), and Uber/Lyft typically cost C$30-50 for UberX/Lyft Standard. This guide compares all options — cost, time, when each makes the most sense — and gives the practical details that save you from rookie mistakes.

    Yvr Options
    Photo by SHOX ART via Pexels. YVR transit options compared — Canada Line, taxi, Uber, Lyft, private car, rental.

    YVR to Downtown: All Your Options Compared

    Quick comparison table of all options for a typical solo traveler with one suitcase:

    • Canada Line SkyTrain: 25 min, C$9.00 (peak) or C$7.75 (off-peak), every 6-7 min
    • Taxi: 25-35 min, C$36-45 zone fare to downtown hotels
    • UberX/Lyft Standard: 25-35 min, C$30-50 typical (varies by surge)
    • UberXL/Lyft XL: 25-35 min, C$45-70
    • Private town car: 25-35 min, C$75-100 pre-booked
    • Rental car: 30-40 min including pickup, C$40-100/day plus parking
    • Hotel shuttle: Varies; some hotels free; commercial shuttles C$15-25

    Best for solo travelers: Canada Line SkyTrain.
    Best for couples or 2 with luggage: Canada Line still cheapest; UberX competitive at C$15-25/person.
    Best for groups of 3+: UberXL or taxi (per-person cost approaches transit).
    Best for cruise passengers with multiple bags: Pre-booked town car or taxi.
    Best for late-night arrivals (after 1 AM): Taxi or rideshare (Canada Line stops 12:57 AM).

    Yvr Canadaline
    Photo by Glen Zi 加侖子 via Pexels. Canada Line SkyTrain — 25 minutes YVR to Waterfront, every 6-7 minutes daytime.

    Canada Line SkyTrain (Recommended)

    The Canada Line is the gold standard for getting between YVR and downtown. The trains are clean, frequent, fast, and integrated into the airport — you don’t even need to leave the terminal.

    How it works:

    • Walk from your gate to YVR-Airport Station (signs throughout the airport)
    • Buy a Compass Card or single fare at the ticket vending machine; tap-to-pay credit/debit cards also work directly at the gate
    • Board the train heading to Waterfront (downtown direction)
    • Trains run every 6-7 minutes 5 AM-midnight; every 20 minutes during late hours
    • Stops between YVR and downtown: Bridgeport, Marine Drive, Langara-49th Avenue, Oakridge-41st Avenue, King Edward, Broadway-City Hall, Olympic Village, Yaletown-Roundhouse, Vancouver City Centre, Waterfront
    • Total time YVR to Waterfront: ~25 minutes

    Cost:

    • Adult one-way (peak): C$9.00 (C$4.00 zone fare + C$5.00 YVR AddFare)
    • Adult one-way (off-peak after 6:30 PM weekdays, all weekends/holidays): C$7.75
    • 2026 fare hike effective July 1: peak C$9.30, off-peak C$8.05
    • YVR AddFare only applies leaving the airport, not returning to it

    Compass Card vs. credit card tap: If staying 3+ days and planning multiple transit rides, buy a Compass Card (C$6 deposit, refundable) and load stored value — you save C$0.50/ride vs. cash. For 1-2 transit trips total, just tap your contactless credit/debit card directly at the gate.

    Where to alight downtown:

    • Waterfront: End of the line. Closest to Canada Place (cruise terminals), Pan Pacific, Fairmont Pacific Rim, Coal Harbour hotels.
    • Vancouver City Centre: Robson Street, Pacific Centre, Sheraton Wall Centre, Hotel Georgia.
    • Yaletown-Roundhouse: Yaletown hotels, OPUS Vancouver, Loden Hotel.
    • Olympic Village: False Creek south side, Olympic Village hotels.

    Luggage: Trains accommodate suitcases — there’s open floor space at the ends of cars. Avoid weekday rush hours (8-9 AM and 4:30-6 PM) if you have multiple large bags.

    Yvr Taxi
    Photo by Ono Kosuki via Pexels. YVR taxis — flat-rate zones C$36-45 to most downtown hotels; meter and credit cards accepted.

    Taxi from YVR

    YVR uses a zone-based flat-rate taxi system, so you know the price before getting in. Taxis are licensed and metered.

    Where to find them: Domestic and International Arrivals levels — exit through customs and look for the taxi dispatch outside doors marked “Taxi.” Dispatchers will assign you a cab.

    Zone fares (approximate):

    • Downtown Vancouver / Stanley Park: C$36-45
    • West End: C$36-42
    • Yaletown: C$36-42
    • Coal Harbour: C$38-45
    • UBC: C$32-38
    • North Vancouver / West Vancouver: C$60-75 (includes bridge tolls)
    • Burnaby: C$45-60
    • Richmond hotels: C$15-25 (10-minute ride)

    Tipping: 10-15% standard for good service. Most cabs accept credit/debit cards now.

    Wait times: Generally under 5 minutes during the day; longer late evening when fewer cabs queue.

    When to choose taxi: Cruise passengers with 3+ bags, late-night arrivals, families with car seats (request when booking via dispatch), accessibility needs.

    Yvr Rideshare
    Photo by Thought Catalog via Pexels. YVR Uber and Lyft — Level 2 Departures Pillars 14-17 pickup; C$30-50 typical.

    Uber & Lyft from YVR

    Uber and Lyft both operate at YVR with designated pickup areas.

    Pickup location: Both rideshare services pick up at Level 2 Departures, Pillars 14-17 (specific signs guide you). Walk up one level from arrivals via the Air Canada or main escalators.

    Cost:

    • UberX: C$30-50 to downtown (typical)
    • UberXL: C$45-70 (6-passenger SUVs)
    • Lyft Standard: C$28-45 to downtown
    • Lyft XL: C$45-65
    • Surge pricing: rare to extreme — late-night flight banks, Saturday nights, weather events can spike fares 1.3x-2.0x

    Service comparison: Uber has more service options in Vancouver (7 levels including Comfort, Premier, Pet, Black). Lyft has Standard and Plus only.

    Pros vs. taxi: Often cheaper, app-based booking, transparent fares. Cons vs. taxi: Surge unpredictable; longer waits during high demand; less luggage capacity in standard sedans.

    Tipping: 10-15% via the app. Drivers expect it; not auto-included.

    Yvr Private
    Photo by Pavel Danilyuk via Pexels. Private and town car services — fixed C$75-110 sedan, C$120-180 SUV, pre-booked.

    Private Car & Town Car Services

    Pre-booked private services offer fixed-price luxury transfers with named drivers and meet-and-greet at arrivals.

    Companies operating Vancouver: Limos.ca, Northwest Limousines, Empire Limousine, Bel-Air Limousine. Most major hotels can recommend or pre-book on your behalf.

    Cost: C$75-110 for a town car (sedan); C$120-180 for an SUV; C$200+ for stretch limousine.

    When it makes sense: Multi-bag cruise passengers, business travelers expensing transfers, groups of 3-5 wanting comfort, families with multiple car seats (specify when booking), special-occasion arrivals.

    Booking lead time: 24-48 hours minimum; longer for premium vehicles or large groups.

    Yvr Rental
    Photo by Simberto Brauserich via Pexels. Rental cars at YVR — all major brands; concession fees apply; C$40-150/day range.

    Rental Car from YVR

    If you need a car for day trips (Whistler, Vancouver Island, Squamish), pick it up at YVR rather than downtown — airport rental is cheaper and avoids downtown parking hassle on day one.

    Major rental agencies at YVR: Avis, Budget, Enterprise, Hertz, National, Alamo, Thrifty, Dollar — all in the Domestic Arrivals area, accessible via the rental car center on Level 1.

    Cost benchmarks: C$40-80/day economy; C$80-150/day midsize SUV; C$150-300/day luxury or large SUV. Add insurance, taxes (PST + GST = 12%), and YVR rental concession fees (~C$5-15/day).

    Downtown parking premium: Hotel parking C$35-65/day. Public lots C$25-40/day. Plan around this if your itinerary is mostly downtown — rent only for day-trip days, not the entire stay.

    When NOT to rent: If you’re staying mostly downtown and using transit + occasional rideshare, you’ll often save C$200-400/week skipping the rental.

    Yvr Hotel Shuttles
    Photo by Giridharan Rajenthara via Pexels. Hotel shuttles — Richmond YVR-area hotels offer free shuttles; downtown hotels rarely.

    Hotel Shuttles & Pre-Booked Transfers

    Some hotels offer free or discounted YVR shuttles. Most are at hotels in Richmond near the airport.

    Free shuttle hotels (Richmond, near YVR): Sheraton Vancouver Airport Hotel, Pacific Gateway Hotel, Hilton Vancouver Airport, Marriott Vancouver Airport Hotel, Holiday Inn Vancouver Airport. Useful if you have an early flight or layover and want airport-adjacent stay.

    Downtown hotels: Most do NOT offer free YVR shuttles. The Canada Line is fast and cheap enough that hotel shuttles are uneconomic. Some luxury properties (Pan Pacific, Fairmont Pacific Rim) include town-car transfers in higher-tier room rates or upon request.

    Commercial shuttles: YVR Skylynx (Pacific Coach) operates Vancouver-Whistler service. For local downtown shuttles, services have largely disappeared as transit and rideshare replaced them.

    Yvr Cruise Transfers
    Photo by Jeffry Surianto via Pexels. YVR to cruise terminal — Canada Line + walk, taxi flat rate, or pre-booked transfer.

    Direct YVR to Cruise Terminal Options

    Vancouver’s main cruise port is Canada Place (downtown, walking distance from Waterfront Station). Some smaller departures use Ballantyne Pier (further east, not transit-accessible).

    Canada Line + walk: YVR to Waterfront Station, then 5-minute walk to Canada Place. Total: ~30 minutes, C$9.00. Works fine for cruise passengers willing to manage 2 bags max.

    Taxi: YVR to Canada Place flat-rate ~C$38-42. Ideal for 3+ bag cruisers.

    Pre-booked transfer: Many cruise lines offer YVR-Canada Place transfers C$25-40/person. Often combined with city tour or pre-cruise hotel.

    Tip: Schedule cruise embarkation transfer to arrive 90 minutes before boarding. Allow 60+ extra minutes for international flight customs delays.

    Yvr Luggage
    Photo by Magda Ehlers via Pexels. YVR luggage tips — bag check service, luggage forward to Whistler, hotel pre-check-in storage.

    Luggage Tips & Storage

    YVR has decent luggage logistics but plan ahead.

    Luggage storage at YVR: Bag Check Vancouver in International Arrivals. Hourly and daily rates. Useful if you have a long layover and want to explore Richmond or Steveston.

    Luggage forward services: If carrying skis, golf clubs, or oversized luggage, services like SkiButlers and Luggage Free can ship gear from YVR to Whistler or hotel. Book 48+ hours ahead.

    Hotel bag storage pre-check-in: Most downtown hotels accept luggage 4-8 hours before standard 3 PM check-in. Just go to the hotel, drop bags, and explore until your room is ready.

    Cruise terminal early bag drop: Most cruise lines accept bags 2-4 hours before boarding at Canada Place. Drop, board later, walk around downtown.

    Yvr Arrival
    Photo by Kenneth Surillo via Pexels. Stepping off the plane at YVR — customs, baggage claim, transit options walk-through.

    Stepping Off the Plane: Walk-Through

    What to expect from gate to downtown.

    1. Domestic vs. International arrivals: Domestic flights (from elsewhere in Canada) skip customs — just walk to baggage. International flights enter customs first; expect 10-30 minutes processing depending on time of day.

    2. Customs (international only): Use the Primary Inspection Kiosks (PIK) — touch-screens that scan your passport, ask questions, and print a receipt. Faster than human officers for most travelers. NEXUS members have separate fast lanes.

    3. Baggage claim: Carousels typically deliver bags 15-30 minutes after landing. Note your carousel number on the arrival monitors.

    4. Customs declaration (international): Hand over your PIK receipt at the customs exit. Most travelers walk straight through; secondary inspection takes a few extra minutes.

    5. Choose your transport: SkyTrain signs immediately visible on Level 1 (Domestic Arrivals) and the level above (International). Walk to YVR-Airport Station — typically 5-7 minutes from baggage. Taxis and rideshare have separate pickup zones (taxi at arrivals; rideshare at Level 2 Departures, one level up).

    6. Boarding the train: Buy fare at vending machine or tap your card directly at the gate. Trains every 6-7 minutes in daytime.

    Total time gate-to-downtown-hotel: ~50-75 minutes including customs, baggage, walk to train, train ride, and walk to hotel.

    Yvr Late Night
    Photo by ArtHouse Studio via Pexels. Late-night YVR options — Canada Line until 12:57 AM; taxi/rideshare 24/7.

    Late-Night & Early-Morning Options

    Canada Line operates 5:08 AM to 12:57 AM from YVR. Last train downtown: 12:57 AM.

    Late-night arrivals (after 1 AM): Taxi (always available; no surge), Uber/Lyft (still operating but limited cars; potentially surging).

    Pre-5 AM departures: Canada Line resumes 4:49 AM from downtown. Allow 30 minutes for the train + 30 minutes airport check-in security buffer = 60 minutes door-to-gate.

    Red-eye arrivals: If your flight lands 11 PM-1 AM, plan for a fast-moving customs line (most red-eyes are sparse) and either take the last Canada Line train or a taxi/rideshare.

    Sleep at airport option: YVR is rated one of the world’s most comfortable layover airports. The Fairmont Vancouver Airport Hotel is inside the terminal (no need to leave secure area). Marriott, Hilton, and Sheraton all have free shuttles for transit between airport and hotel.

    YVR Airport Amenities Worth Knowing

    YVR isn’t just a transit hub — it’s a destination unto itself, regularly ranked among the world’s best airports.

    Free WiFi: Unlimited and fast throughout all terminals.

    Free fresh-water dispensers: Beyond security at multiple gates.

    Indigenous art collection: One of North America’s largest airport art collections, including the Bill Reid masterwork “The Spirit of Haida Gwaii: The Jade Canoe” near International Departures security. Worth budgeting 30 minutes pre-flight to walk the public art route.

    Aquariums and water features: Indoor jellyfish tank, salmon-stream installation, and waterfall feature in International Arrivals create soothing transitions.

    Yoga studio: Free meditation and yoga space (with mats) on Level 4 of the International Terminal.

    Pet relief areas: Indoor and outdoor pet relief stations throughout. Pet-friendly traveler? Ask at info desks for the closest one to your gate.

    Childrens’ play area: Located in Level 4 International. Includes climbing structures and tablet stations.

    Quiet zones: Designated rest areas with reclined seating in International Departures.

    Spa and shower facilities: Plaza Premium Lounge and the Fairmont Vancouver Airport Hotel both offer day-use access for non-guests at C$20-50.

    Coffee and food: 49th Parallel Coffee, Tim Hortons, multiple sit-down restaurants. Vancouver’s coffee scene is well-represented.

    Best Option by Traveler Type

    Solo backpacker: Canada Line. Cheap, fast, no hassle.

    Couple on a city break: Canada Line. C$18 saved over rideshare; barely longer.

    Family of 4 with luggage: Taxi or UberXL. Per-person cost is similar to transit; spares you wrestling 4 bags through stations.

    Business traveler with a meeting in 2 hours: Canada Line if downtown core; rideshare/taxi if heading to Burnaby, Richmond, or suburbs.

    Cruise passenger with 4+ pieces of luggage: Pre-booked town car or taxi.

    Senior traveler or mobility-limited: Pre-booked accessible taxi or hotel-arranged transfer.

    Late-night arrival (after 1 AM): Taxi or rideshare. Canada Line stops at 12:57 AM.

    Whistler-bound after arrival: Skylynx bus (Pacific Coach) directly from YVR — skip downtown entirely.

    Vancouver Island-bound: Compass Bus or Pacific Coach to Tsawwassen ferry; or rental car for flexibility.

    Money-Saving Hacks for the Transfer

    1. Use the Canada Line. The single biggest savings — C$25-45 saved vs. taxi.

    2. Travel off-peak. Weekday evenings after 6:30 PM and weekends save C$1.25 on the train fare.

    3. Buy a Compass Card if staying 3+ days. Save C$0.50/ride and use it everywhere on transit.

    4. Skip the rental for downtown stays. Avoiding a 5-day rental + downtown parking saves C$300-600.

    5. Compare Uber vs. Lyft pricing. Lyft is often C$2-5 cheaper. Check both apps before booking.

    6. Avoid surge pricing windows. Late-night flight banks (10 PM-1 AM) and Saturday evenings often surge. Either go before or wait 30 minutes for surge to drop.

    7. Group rideshare splits. If you meet other travelers in the customs line going to the same hotel, splitting an UberXL is cheaper than separate rides.

    8. Use credit card travel credits. Some Canadian and US credit cards reimburse rideshare expenses up to a monthly cap.

    9. Pre-book transfers via Costco Travel or hotel packages. Sometimes 20-30% cheaper than walk-up rates.

    Yvr Faqs
    Photo by Vinny Anugraha via Pexels. Common questions about YVR to downtown — time, cost, late night, accessibility.

    YVR to Downtown FAQs

    How long does it take from YVR to downtown Vancouver?
    By Canada Line SkyTrain: 25 minutes. By taxi or rideshare: 25-35 minutes depending on traffic.

    How much does the YVR SkyTrain cost?
    C$9.00 peak (weekdays before 6:30 PM); C$7.75 off-peak (weekday evenings and weekends). 2026 fare hike effective July 1: peak C$9.30, off-peak C$8.05.

    Can I take Uber from YVR?
    Yes. Pickup is at Level 2 Departures, Pillars 14-17. Typical UberX fare to downtown: C$30-50.

    Is the Canada Line wheelchair accessible?
    Yes. All stations have elevators, all trains are level-boarding, and the airport-to-station walk is fully accessible.

    How early should I leave my downtown hotel for a flight at YVR?
    Allow 90 minutes for domestic flights, 120 minutes for international. That’s 30 min train + 60-90 min check-in/security.

    Is there a direct shuttle from YVR to Whistler?
    Yes — YVR Skylynx (operated by Pacific Coach) runs daily from YVR to Whistler Village in approximately 3.5 hours, C$80-120 one-way.

    Where do I buy a Compass Card at YVR?
    At any TransLink ticket vending machine on the Canada Line platform. The deposit is C$6 (refundable) and you can load any amount of stored value.

    Related reading: Pair this with our Vancouver transportation guide pillar, SkyTrain visitor guide, and Compass Card explainer.